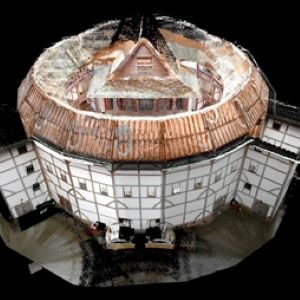
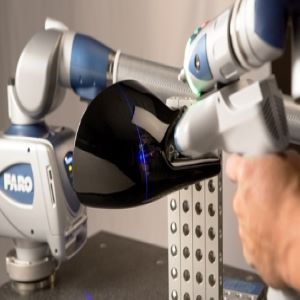
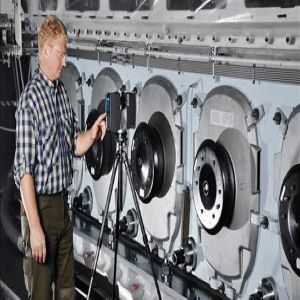
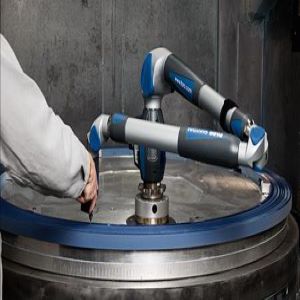
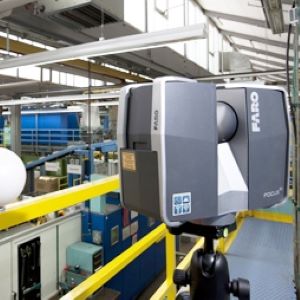
As-built surveys using 3D laser scanning technology, such as the FARO Laser Scanner, provide users with detailed point clouds which enable 3D modelling for diverse tasks including building reconstruction, plant layout and enhanced data presentation with augmented reality.
With fast turnaround times on scans of buildings and entire environments, FARO’s 3D laser scanner, can deliver fully surfaced CAD models for a variety of industries. Architectural design, civil engineering and construction, facility management, and cultural heritage have all benefited from this 3D FARO solution.
With the FARO scanner, Escaliers Cochard has no more worries with staircase installations
Escaliers Cochard builds made-to-measure stairs, adapting them to the configuration of the site as closely as possible. This means it is always essential to visit the site in person, to survey the topography of the premises. The tiniest detail is important here! If the staircase is to be placed in the corner of a room, it is essential to take into account the angle of the walls and whether they slope or bulge out or in. It is also important to note the presence and location of any switches or electric sockets.
For a long time, Escaliers Cochard used traditional measurement methods, notably laser rangefinders, and trigonometry formulas to calculate angles. Things went fairly quickly when dealing with relatively new buildings, with flat, vertical walls forming right angles. “But a large number of the staircases that we install are located in old houses and buildings where the walls are distorted and often sloping. They may also have protuberances, such as beams sticking out. 
All of this need to be taken into account, meaning that the survey could take a long time, sometimes several days,” explains Jean-Michel Cochard, founder and manager of Escaliers Cochard. When the client’s building is situated tens of kilometres away, the cost of the survey could become very high (in terms of travel and work time). “Since we started using FARO’s laser scanner, things have become much easier. Surveys are carried out in a few hours at the very most. We are also guaranteed not to forget anything; we no longer have to return to the site to check a particular detail. We bring the client’s home to us!” continues Jean-Michel Cochard.
The founder of Escaliers Cochard is passionate about technology and monitors technological developments constantly. He had therefore been aware of the existence of laser scanners for a long time (via the Internet) and knew that they could make his life easier. But the investment was not insignificant for an SME…
With the arrival of the new FARO model, which is less bulky and less expensive, Mr Cochard decided to take the plunge, telling himself that he could easily pool use of the instrument with another company if he had problems getting a return on his investment. After all, he felt it was a universal tool that could prove beneficial to all associated trades (architects, surveyors, decorators, builders, heating engineers, etc.). This idea quickly proved unnecessary, as the laser scanner was in use every day…
Beyond the functions themselves, Escaliers Cochard was delighted with the tool’s ease of use. After a few hours of onsite training provided by FARO, the company “took control” of the scanner and other people were trained on the job. Use of the scanner proved much easier than expected, remarks Jean-Marie Cochard: “FARO gave us recommendations to guarantee the tool’s precision. In fact, some of them were superfluous because its intrinsic performance largely goes beyond our needs and a slight decrease in precision is not a problem.” For instance, in a building where it is necessary to survey several rooms or levels, Escaliers Cochard does not deem it essential to apply the entire process of restarting the device, enabling time savings.
3D documentation of the magnificent glass roof of Leicester University Engineering Building
3D SurveyScan LLP acquired a Faro Focus3D in December 2011. They realised a potential in the market to offer a service using the scanner in various industry environments. 3D SurveyScan was amazed as to how little these industries knew of 3D scanning and point clouds. Even today, people from all industries are just beginning to realise the potential of using scanning to assist them in their day-to-day projects. Especially as BIM (Building Information Modelling) is the way the government is pushing the industry forward with revit being the choice of software to model in. Before measurements would have been carried out by disto and tape measure. “The package 3D Surveyscan is offering is very flexible from providing a basic point cloud for the client to use themselves to model. Or we can give them the whole package including modelling services” states Ron Smith, co-owner of 3D SurveyScan LLP. So far 3D SurveyScan has produced quality packages for varying markets. Ranging from private dwellings, retail outlets providing floor and ceiling plans, to National Grid pumping stations, to office buildings including ceiling voids and heritage work.
Scanning of glazed roof area of Leicester University Engineering Building
The heritage work of 3D SurveyScan included a project to scan the Engineering Building at Leicester University with its magnificent roof made of glass. Built in the early 1960s it is due a major overhaul to replace the glazing in March of 2013. It was the task of 3D SurveyScan to produce a point cloud for the client to model the new roof using revit. “Because of the size of the roof we scanned the building completing 16 workspaces averaging between 30 and 40 scans per workspace” Ron Smith pointed out. The workspaces would involve both internal and external scans. All targets and deadlines were completed on time for the project. Scanning took place over a period of 10 days. Registration of the scans was achieved using the FARO Software Scene 5.0 in combination with the laser scanner. Preparation was really important and checkerboard targets were used as the main form of correspondence. Spheres were used to gain registration into smaller rooms. Because of the size of the project a total station was used in conjunction with the Faro Focus3D to produce control conditions for the project.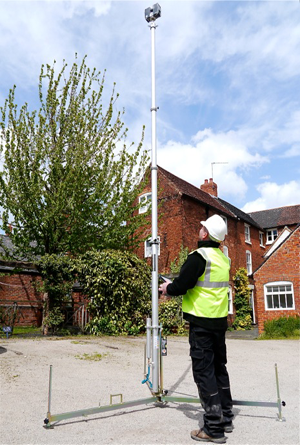
7 meter mast
Often 3D SurveyScan has to measure roof voids and they had height problems for the scanner. Now they have been overcome with a unique mast system reaching up to height of 7 meters. To start the scanner automatically 3D SurveyScan LLP has acquired a Samsung tablet which links in to the WLAN system on the scanner. Ron Smith also highlights “FARO Webshare is to be a very important part to our business. It is a major advantage to publish the scan data on FARO Webshare to enable the client to view and share the date. Clients are fascinated to see they can gain access to measurable information via our server at our office. This information is of course protected at source so only the client can gain access to their personal information”.
Stretching assignment in rubber plant
The city of Togliatti on the great Volga river is famous for Lada cars and a thriving petrochemicals industry. The Togliattikauchuk plant is one of the largest petrochemical complexes of its type and focuses on the production of synthetic rubber for use in anything from car tyres to medical devices and from rubberised fabrics to construction industry products. To facilitate plant improvement works, a 3D scan of the whole plant was commissioned and the project manager Acropol-Geo called on the services of 3DLS to conduct the scanning and post-processing tasks. The 3DLS team included 3D scanning specialists who have spearheaded the application of laser scanning techniques to a range of engineering challenges in Russia.
“Making an accurate 3D representation of a petrochemical plant was never an easy task. But thanks to modern laser scanners like the FARO Focus3D, what used to take an army armed with measuring tapes and theodolites years, can now be done with a few well-equipped individuals in a matter of months,” said Maxim Khmelevskiy, Project Manager, 3DLS. “And best of all, achieving satisfactory result is now possible thanks to the sheer accuracy, reliability and speed of today’s tools.”
The 3DLS team set to work with a larger geodesic scanner for the big picture coordinate measurements and a nimble FARO Focus3D for the detailed scanning. The 5-hectare site is strewn with many miles of multi-level interlocking pipes and cables of different diameters, making it impossible to break up the plant into smaller projects. The end result needed to be an integrated and accurate model of the whole plant. Scanning conditions were close to extreme: the plant production processes produced dangerous temperatures and pressures, escaping steam, harmful chemical emissions, noise and vibration.
Under these conditions the portability and ease of use of the FARO Focus3D supported quick and safe work. It could be moved without switching off and the powerful battery gave up to five hours of cablefree operation. The post-processing was also very intensive and the team developed their own “total scan” workflow, which they estimated is five to six times more efficient than a traditional survey approach based on spheres and stitching. They also employed proprietary software to handle problems like platform vibrations. In total 8,158 scan positions resulted in over 12.5 billion cloud points. By the end of the 102-day project all the data had been pre-treated in FARO Scene software before alignment in InnovMetric PolyWorks and registration of the scans in the plant coordinate system.
Fascinating visitors in the Cathedral of Steam

The first idea was to use 3D scans to create accurate As-Built Documentation ” for the renovation work. But the project quickly developed to include solutions that also support the visitor centre during the long period of renovation. “We spent 10 working days collecting about 185 scans with a FARO Laser Scanner Focus3D. Together with some conventional surveying information these were registered in the software SCENE from FARO and then exported to the FARO WebShare environment,” explains Eric Borst of Royal HaskoningDHV. Web- Share allows any authorized user to log in to the server and explore the processed scans of the whole site. “So you can navigate around the pumping station and look at the full 360° colour views from each scan position. Then there are various user tools for in-depth examinations.”
“With more than 10,000 visitors per year and the building covered in scaffolding or with whole areas closed-off due to the renovation work, it was important to have an exciting exhibit in the visitor centre. We also wanted to maintain the interest of
more casual visitors.” So the next step was to export the data to Autodesk 3D Studio Max, with the Alice Labs Point Cloud plugin. This was used to create a virtual tour – a 6 minute film that visitors can watch on 32-inch touch screens. It is a virtual
flight through the building, with the option to stop in different places and see detailed information about the actual progress of the renovation work.” Borst and his team have also been able to take the visitors into places that you could otherwise never enter – like inside a steam boiler or down into the pitch dark areas below the waterline. “Because the Focus3D is so compact and light, we often acquire unusual perspectives. Dispensing with the tripod, we can stick the scanner down a drain or into a boiler casing – obviously something you could not do if the scanner was bigger or heavier,” notes Borst with satisfaction.
