Ensuring the quality of a car’s performance and design, 3D measurement technology solutions from FARO provide a simple, yet accurate way of taking contact and non-contact measurements for quality control in automobile manufacturing and assembly.
Portable CMMs such as articulating arms can be used for rapid prototyping, analyzing car body panels or inspecting a body-in-white, while large-volume laser trackers can be implemented for alignment, robot calibration or first article inspection tasks. For as-built documentation and plant layout projects, FARO’s 3D laser scanner is the ideal solution.
Whether it’s motorsports, prestige cars or utility vehicles, FARO has a three-dimensional measurement solution for all your automotive inspection and modeling needs.
A special measurement arm for a special bike
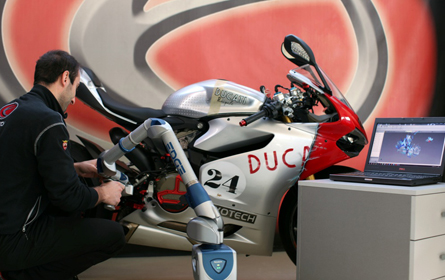
Evotech, based in Villa Agnedo (Trento, Italy), purchased the FARO Edgemeasurement arm equipped with the Laser Line Probe and CAM2 Measure 10 measurement software to perform reverse engineering activities, beginning with a project dedicated to a very special motorcycle.
Evotech is a company with an international reach that manufactures special aftermarket accessories and components for sport and naked bikes. Certified engineer Matteo Tisi, the firm’s Research, Design and Production Manager, provides a brief account of the story: “When the company was founded in 2004, it began with the manufacture of standard and decidedly simple components. However, the company’s know-how has grown exponentially over the course of 10 years, and today the Evotech brand is synonymous with technology, style and quality worldwide.”
Particular attention is paid to the development of products that celebrate the concepts of design, functionality and ease of assembly. Evotech is therefore one of the points of excellenceof ‘Made in Italy’ manufacturing, and has been able to raise its technological level by investing a good percentage of its yearly profits in research and development and cutting-edge production facilities. Matteo Tisi continues: “The last step in this development process consisted of implementing a modern rapid prototyping and reverse engineering centre, which makes it possible to immediately progress from idea to product and to create and test several solutions for each new application.”
This is why Evotech chose to invest last summer in a FARO Edge ScanArm, a next-generation portable seven-axis measurement arm equipped with a Laser Line Probe, used for contact and non-contact measurements: this device is the ideal solution to create a rapid interface between activities such as part/CAD comparison, 3D modelling and, of course, rapid prototyping and reverse engineering. Matteo Tisi explains the reason for this decision: “Personally, I had been familiar with FARO instruments for a few years because of my prior experience at university and at Fiat’s centro costruzioni sperimentali (experimental construction centre).
For its part, Evotech became interested in these devices following participation in specialised trade fairs. A very special project was what finally pushed us to purchase the measurement arm.” Tisi explains: “to ‘convey’ to the market our idea of performance and the dynamic nature of our products, we wanted to create a motorcycle, called the Trentino Naked 3, which would be able to achieve exceptional performance on the track.
In the guise of a naked bike, this motorcycle conceals superbike features, dynamic, excellent performance and a supercharged engine with a mechanical centrifugal compressor that is able to achieve extremely high levels of power while retaining excellent driveability on the track. This move, made for promotional purposes one year ago, has been very successful and has introduced our name to a greater number of enthusiasts and sportsmen. More recently, we planned the construction of a second special bike, this time with a greater focus on concepts such as style and design, while also keeping some surprises in store on the technological side.”
For this new endeavour, Evotech is taking inspiration from a vintage model with a modern twist,brimming with cutting-edge technology and ‘Made in Italy’ style. This is part of the reason why Evotech purchased the FARO Edge ScanArm for use in reverse engineering. “Basically,” Matteo Tisi comments, “FARO has made a great contribution by equipping us with technology that can make our ideas a reality.” Of course, Evotech did not purchase the FARO Edge ScanArm for the special bike project only: the new measurement arm will be used by the company for other manufacturing activities, especially in reverse engineering processes. In addition, for the manufacture of items such as frame holders, plate brackets and engine case covers, the Trento-based company will be able to rely on this tool to scan the relevant items and obtain the point clouds needed to capture the sizes, overall dimensions, profiles, etc. before moving on to the actual design phase.
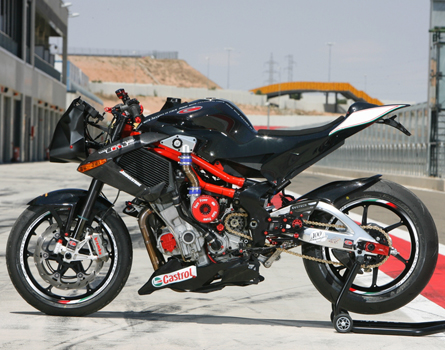
“Every 3D scan is conducted using CAM2 Measure 10 software,” Tisi continues, “which makes our work simple, rapid and flexible, in accordance with various application requirements.” It should also be highlighted that Evotech then loads the data into the SolidWorks software to begin the design phase. The designed part is then 3D printed for the testing phase and, if it passes, production begins.
Matteo Tisi concludes by bringing results and objectives into focus: “We have only been using the FARO Edge ScanArm with the integrated Laser Line Probe and Measure 10 software for a few months, but we can already confirm that this package fully satisfies our needs. The results are already clear: the data acquisition phase is much more exact and precise, production speed has increased and time to market has decreased. This technology is changing the way we conceive of our products and its range of applications could increase significantly.”
Reverse engineering for improvement, prototype & manufacture.
There are many benefits of goods made in China, but nothing beats a local look and feel and supporting your own local manufacturing industry. That thought led Refuse Equipment Manufacturing company (REM) of Saudi Arabia to begin a joint truck localization project with the National Program for Automotive Technology based at the King Abdul Aziz City for Science and Technology (KACST).
Mohammad Al Hussaini, program director at KACST explains, “To improve the Chinese built truck for our regional market, we were asked to identify suitable parts that could be readily reverse engineered, re-styled and then manufactured in plastic. We indentified the front grill and logo, front bumper and the tail lamp assembly”. The detailed scanning of the selected parts and the “body-in-white” were made using the FARO Edge ScanArm and Photon 80. “With the precise and detailed scan data we collected, we were able to design new parts that fit precisely and perfectly match the curvature of the truck panels.” said Mohammed. Prior to using the ScanArm, his team made measurements with patterns, templates and vernier caliper or had the work done elsewhere.
“Using the FARO workflow, we now have scale functional prototypes that fit to the imported chassis with 100% accuracy; and the same CAD model is being used for the development of the manufacturing moulds for mass production of the parts”.
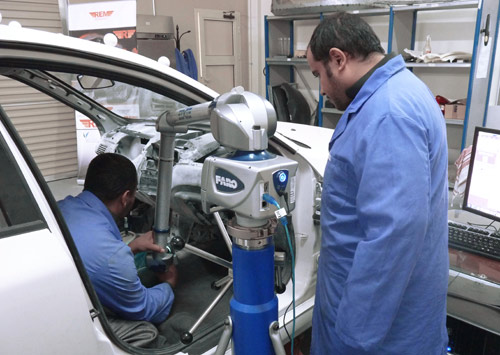
While some of the changes were cosmetic to give the trucks an identifiable Saudi Arabian and distinctive REM styling, there were also opportunities and requirements for technical development. The front bumper is now injection moulded plastic with a re-enforcement bar making it stronger and more effective in use. The original tail-light assembly consisted of thirteen main parts for each side of the vehicle. The redesign not only reduced this to four parts but these now apply to both sides of the truck. KACST consider their design simply looks and works better. It will be easier to assemble, and easier for the end user to maintain.
“The brand name, and the reputation for the latest precision technology led us to FARO, but the scanners we found were indeed those that best suited our requirements. They are easy to use, and scanning with the 7-axis DOF gives us ready access to detail from intricate locations. And with additional FARO accessories we will have even greater flexibility in future use.”
The contours, charisma and creation of supercars
Automotive Inspired by Italian renaissance heroes, legendary car designer Horacio Pagani creates the world’s most exclusive supercars by a masterful fusion of manual craftsmanship and technology.
The Argentinian-born designer Horacio Pagani, has risen to the top of supercar industry making a name for himself through his application of advanced composite materials. At Lamborghini, he worked on the designs of various famous models before founding Modena Design and starting work on his lifelong dream – the Pagani Zonda. Between 1999 and 2011, 206 variations of the Zonda were created and built. In 2011, Pagani revealed his new Huayra. It is a stunning curvaceous creation that is to many eyes, the fulfillment of Pagani’s dream to create the most beautiful car in the world. While championing a commitment to renaissance artists and hand craftsmanship, Pagani is firmly settled in the 21st century when it comes to metrology: the company owns two FaroArm Fusion systems. It also has one FARO Laser Line Probe that can be attached to either measuring arm to provide seamless Laser ScanArm functionality. With these systems, Pagani is perfectly equipped for free form surface measurement, part inspection, part-to-CAD comparison, rapid prototyping and reverse engineering.

Horacio Pagani, you started as a one-man design studio making furniture over 20 years ago. What elements of your approach have stayed constant?
Firstly, when I was about 16, I started learning about Leonardo and the Renaissance. I was fascinated by the way he mixed art and science and I wanted to do the same: to be both an artist and an engineer. That has been the consistent theme throughout my professional life. Secondly, I have always admired plastics because they allow you to be more expressive as a designer. I realised the significance of advanced composites in the eighties and we have been investing in applications of that technology ever since.
Tell us about the mixture of inspiration and technology behind your design process.
The female body was clearly a source of inspiration for the shapes of the Zonda. We work manually in the early stages with pencils and resin models. There is a charm that only the hand can give. When we have the cosmetics perfected, we use FARO 3D portable measuring systems and move into the CAD realm to deal with structural calculations and progress towards CAM.
There are 3 FARO devices in operation in your workshops. What other roles do they play?
We design and build our cars from scratch and we now manage about 10,000 distinct components. We use FARO arms and the Laser Line Probe for all kinds of tasks from reverse engineering during design to inspection and alignmentduring construction. They are an integral part of everything we do.
What new ambitions fuel your vision today?
I still work on many different projects covering automotive, aviation, military, sports and industrial design. Discovering new materials and new technologies still fascinates me.
A Gauge of Quality
Digital modelling and laser measurement are just some of the technologies being used to prove the latest vehicle systems and maintain quality writes Mike Farish
Protean Electric’s product validation manager Mark McDonnell has a 90-strong team working to bring to the market an in-wheel electric drive system in which motor, inverter and mechanical brake system are all packaged inside the wheel assembly. Although the company does have test units running on the road, it is still heavily engaged in an iterative development cycle that sees that sees a new batch of prototypes being built and tested roughly every three months.
Reduced cycle, increased data
The whole system is now used every day, reports McDonnell, and is making a major impact on the company’s testing and quality reporting cycle. The most obvious difference is in the time involved. The sequence that used to take three weeks, he states, is now down to around 12-14 hours because everything – the testing itself and the collation of the resulting information – is completely automated. The actual raw amount of data involved is considerable. Readings are taken every 50 milliseconds, says McDonnell, with the result that some 30MB of data are captured and processed in every test cycle.
Laser triangulation
Elsewhere, one of the more widely-used quality monitoring technologies already used in mainstream automotive manufacturing is in-line gauging by means of laser triangulation. Put simply, a laser source projects focused laser light onto critical features on parts and assemblies within the field of view of a camera that captures the resulting reflection. This image is then processed and evaluated to detect deviations from design intent – for instance mis-positioned holes or attachment points.
Nevertheless, the announcement by the company, in early 2011, of an order from a German automotive manufacturer for some 20 systems to support the manufacture of a new “premium vehicle”, which has recently been launched on the market, provides an indication of the ways in which the application of the technique are developing.
Evolving for more involvement
The reason for their popularity is an evolution in the basic strategy underlying the application of the technology. As opposed to being solely used as a retrospective tool to detect faults at the end-points of particular process areas, it has become a more pervasive statistical process control (SPC) technique that can be used to monitor those processes in detail. As Kearney explains, applying the technology in this way does more than just detect faults, it pinpoints where they are occurring and helps to improve the manufacturing process – a particularly pertinent capability in an automotive plant, where processes such as welding can introduce deviations that may not have been present when a part was originally made.
F1 application
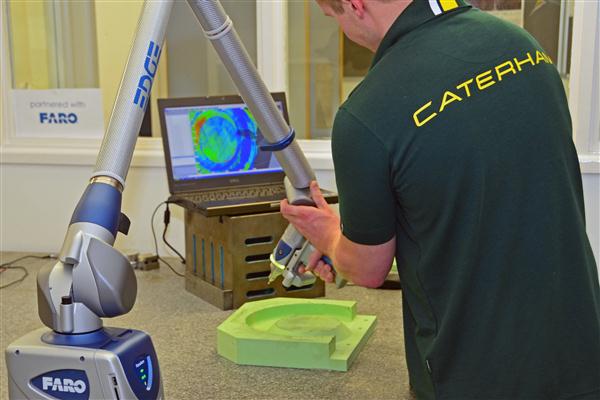
Elsewhere on a smaller scale but with absolutely no diminution in the required standards an outfit that has upgraded its in-house quality control operations within the last few months is Formula One’s Caterham F1 team, based in Leafield, Oxfordshire, UK. Tim Nolan, head of inspection for the team – which with 280 employees is effectively the equivalent of a reasonably-sized SME company – confirms that just last November it took delivery of two manually manoeuvrable arms from inspection specialist Faro, with the option of their being fitted with either laser scanners or ‘hard’ contact probes.
What had happened under the previous regime, Nolan continues, was that the team’s ability to carry out dimensional quality control was restricted by the limitations of its in-house coordinate measuring machines (CMMs), which could not be used with parts that exceeded limits of 1.2m in length and 1m in width. While this was practicable in most cases it meant that the team was totally reliant on its contractors for checking the accuracy of larger parts such as engine covers and vehicle floors. “We will have more confidence in parts that we can check for ourselves,” he states.
Getting the whole picture
The new arms will not only bring these operations in-house, they will also provide the team a much enhanced degree of flexibility in the way that it can employ measurement techniques. Their physical portability, Nolan points out, means, for instance, that they could be used not just with major structural elements of the team’s cars but with the cars themselves. “We will be able to check components on the cars,” he confirms. He even envisages the possibility of their being used to scan the team’s drivers to enable the car seats to be made a more comfortable fit.
Vodafone McLaren Mercedes: Pushing the technology boundaries
FARO is the world’s most trusted source for 3D measurement technology. The company develops and markets computer-aided measurement and imaging devices and software.
The McLaren Group is a rapidly expanding high-technology business based in Woking, Surrey, and the home of the Vodafone McLaren Mercedes Formula 1 racing team.
In such a fast-moving business – around 90 per cent of the components within an F1 car will be redesigned over the course of a racing season – speed, precision and quality are vital.
Vodafone McLaren Mercedes had already been a FARO customer for nearly 10 years before the partnership began in May 2010. FARO is now the McLaren Group’s Official Supplier of measuring systems, which includes the FARO Edge Arm, the FARO Gage and the FARO Laser Line Probe for non-contact measurement, and software such as CAM2 Measure 10, now including point cloud capability.

How the relationship began
While research and development is an important activity, the assembly and production process must be able to translate the results of that development into products which meet stringent quality requirements. The challenge is to take complex forms created on Computer-Aided Design systems and manufacture those components in a way that is not only dimensionally accurate, but which also meets rigorous weight and strength criteria.
Andrew Tagg, Regional Manager UK at FARO Technologies, says: “The first FaroArm went into the composite inspection area, and then subsequently we supplied a Laser Line Probe, which is an attachment on the end of the Arm that’s used for non-contact measurement. It enables the user to scan the surface of a pattern, taking millions of points.
“Using that cloud of data, it shows the operator a colour map deviation that enables you easily to compare the item with the CAD model; in simplistic terms where the cloud goes green, that area is within tolerance. If the colour map turns red that signifies an excess of material, and blue shows that it’s too low.
“As you can imagine, this not only expedited the inspection process, it added a new order of accuracy.
“The next stage of the collaboration was to bring a FARO Gage into the machine shop. This also provides a fast dimensional comparison with the original drawing; it’s a contact mechanism using a ball probe, so it enables you to check the geometric dimensions in 3D. By enabling you to quickly check a machine tool or within a cell of machines, this eliminates all the bottlenecks you get with traditional methods.
“Our aim is to speed the process up, get results quicker. A process that would have taken hours now takes minutes. Rather than reams and reams of paper with values on, you have a graphical display that’s easy to interpret.”
The benefits of partnership
FARO’s equipment enables the McLaren Group to maintain its quality focus, reduce wastage, expedite the prototyping process, and much more. For FARO there is a tangible benefit in terms of feedback from a customer that is operating at the very limits of technology.
McLaren Racing Managing Director Jonathan Neale says: “In a high-precision, time-critical environment such as ours, it’s vital that we can rely on highly accurate measuring and inspection systems in order to guarantee 100 per cent precision within very rapid production and assembly processes.
“Here at Vodafone McLaren Mercedes, we’re justifiably proud of the speed and efficiency of our existing manufacturing and assembly procedures, but FARO’s contribution will not only allow us to increase the speed of those processes, but also improve fidelity and accuracy.”
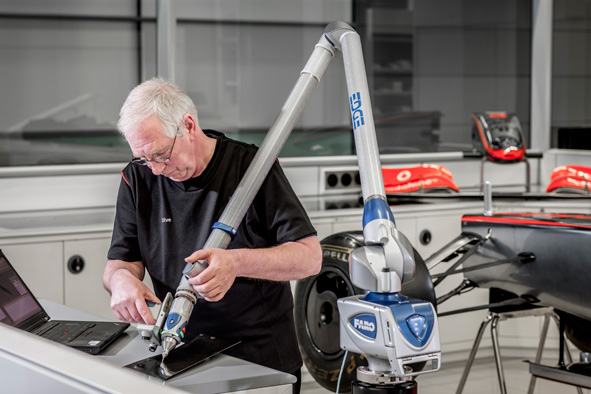
McLaren Racing Head of Quality Alex Smith says: “We use FARO equipment for a number of purposes. Fundamentally, at the front line, we use it for quality control – to ensure that parts meet their design specification and intent. We’ll use the equipment on both: carbon fibre and metallic components, as well as the patterns and mould that are used to create carbon fibre components. Pretty much every part that comes through the business, in fact.
“It’s critical in protecting the car in terms of the quality perspective. If we find defects in components we can feed that back to the manufacturing department and re-evaluate how those components are designed and manufactured, which improves the overall yield.
“We also use the FaroArm in the wind tunnel, and in the model shop to check the models before they go into the tunnel, to ensure that they meet all specifications.
“From an analysis perspective we do a lot of work with the data we generate through the FARO interface to tell us about the components. We analyse the data and trend it to indicate how capable our manufacturing processes are, and that gives us a lovely feedback loop right the way back to the design process. We can have discussions with the designers about tolerances and getting everything right first time so that we have a good yield of parts.
“We’ve worked very closely with FARO for a number of years and done a lot of product development work with them. Our feedback has been incorporated into a number of new software releases. It’s a very good working relationship.”
Andrew Tagg says: “Our systems help to eliminate a lot of wastage and they enable McLaren Racing to press ahead with new designs. They have such a rapid turnaround because they’re always developing something new, whether it’s a prototype component to evaluate in the wind tunnel or a finished item to go on the race car. If you have to wait to put that component on a traditional measuring machine, you’re adding delay to the process.
“Since we’ve become partners we’ve gone into many areas of McLaren Racing, including the wind tunnel preparation area. The FaroArm can be used to set the datum on what the aerodynamicists call the ‘spine’ on the wind tunnel car, and they provide a live digital readout for precise positioning of the components on the spine. That’s a benefit in terms of speed and accuracy, as well as flexibility, because those parts can be readjusted to very precisely defined co-ordinates.
“We’ve also gone into vehicle dynamics, the testing rig, and our products are also being used by McLaren Automotive.
“They’ve helped us develop our software, providing fantastic feedback that has driven through a lot of performance improvements, such as shortcuts for commonly used subroutines.”
The future
Alex Smith says: “We need to maintain alignment with the latest developments because as a technology company we’re always pushing the boundaries. As our geometries become more complex and more difficult to measure using traditional methods, we look to FARO for the development of new solutions.
“I always look to get the latest FARO products into the building and I know they’re equally keen to test their new developments in such a demanding environment.”
About the customer: VODAFONE McLAREN MERCEDES
Since 1963, McLaren Racing has become one of the most successful and groundbreaking teams in Grand Prix motor racing, creating some of the most iconic Formula 1 cars in the sport’s history.
Vodafone McLaren Mercedes had already been a FARO customer for nearly 10 years before the partnership began in May 2010. FARO is now the McLaren Group’s Official Supplier of measuring systems, which includes the FARO Edge Arm, the FARO Gage and the FARO Laser Line Probe for non-contact measurement, and software such as CAM2 Measure 10, now including point cloud capability.
Objective – Leadership in Innovation

The FARO system is equally impressive for taking exterior as for interior measurements in Dingolfing and Regensburg.
FARO has successfully combined three tried-and-tested measuring systems in the Track ScanArm. The mobile measuring system is particularly impressive in the measurementof entire vehicles, not least as a result of its efficiency.
The BMW Group relies on the latest, stateof- the-art technologies, in particular in development and production. In this context, the Track ScanArm from FARO, which is used at the plants in Dingolfing and Regensburg (both in Germany), represents an equally clever and mobile measuring system in Geometric Integration measuring technology. What was required was a system for recording tactile points and surfaces irrespective of location, as well as wireless transfer rather than via a tool. Calibration was therefore not to be conducted by means of reference marks, as this represents an uncertainty factor, for example because of the moving parts.
The objective was clearly non-contact wireless transfer – this was the basic requirement of the system to be procured. FARO’s Track ScanArm, which ideally satisfied the requirement profile, was ultimately ordered for the German plants.The Track ScanArm combines the FARO Laser Tracker, the seven-axis FaroArm Quantum with a range of 2.4m, and the Laser Line Probe V3 scanner. The package is completed by Polyworks software. All measuring systems can be linked together by means of a common coordinate system. The coordinate system can be calibrated either by means of the laser tracker, by means of tactile measurements by the FaroArm or through scanned measurements. The coordinate system is then transferred to each of the other systems, for example from the tracker to the arm or vice versa – and thus from any vantage point. As the fixed base, the laser tracker either stands on the tripod as in Regensburg or is hung from the ceiling as in Dingolfing. The coordinate system is transferred from the fixed base of the laser tracker to the arm, irrespective of where it is located in the respective measuring environment. This means that you calibrate and can then carry out measurements – separate from the tracker and without any visual contact – of both the exterior and the interior of the vehicle, with all seven degrees of freedom. Tactile measurements or the scanning of surfaces are ideal for precisely those places that cannot be reached with the laser tracker. The Track ScanArm ultimately combines the advantages of the laser tracker, tactile measuring arm and laser scanner systems, supplemented by powerful software and a computer.
FARO provided a suitable partner for the implementation of this ambitious project for the two Bavarian BMW plants simply because FaroArms have already been successfully employed both in Regensburg and in Dingolfing for some ten years now. The plant in Lower Bavaria alone currently has a wide range of FaroArms from the Gold, Fusion and Platinum series. The initial presentations of the Track ScanArm were carried out as long ago as 2006. The system finally became really interesting for metrologists when FARO was also able to offer wireless vehicle network transfer. Procurement was followed by the installation phase, during which the specialists from both partners contributed their expertise. The Track Scan- Arm has been in operation as planned since mid-2009. In the end, there were several reasons that spoke in favour of the FARO system compared to that of a competitor. These included not only the price but also the fact that the quality experts at both plants were already familiar with the measuring arms and their high level of accuracy. There is also the “monopoly position” resulting from the fact that at the time FARO was the only company able to offer wireless transfer of the vehicle network.
The combination of tracker, tactile measuring arm and laser scanner has proven absolute stood the testing in both Dingolfing and in Regensburg. Not least because transfer can be carried out anywhere and the system offers all degrees of freedom – so that there are no limitations. The specialists at BMW have also come to appreciate the mobility of the measuring system. The Track ScanArm also plays a similarly important role for the Regensburg plant as a replacement for and a supplement to the underfloor measuring system, in order to avoid capacity bottlenecks. If the stationary measuring machine is busy, the FARO system offers the flexibility of enabling positioning the vehicle wherever there happens to be space at the moment, and the measurements can then be carried out there.
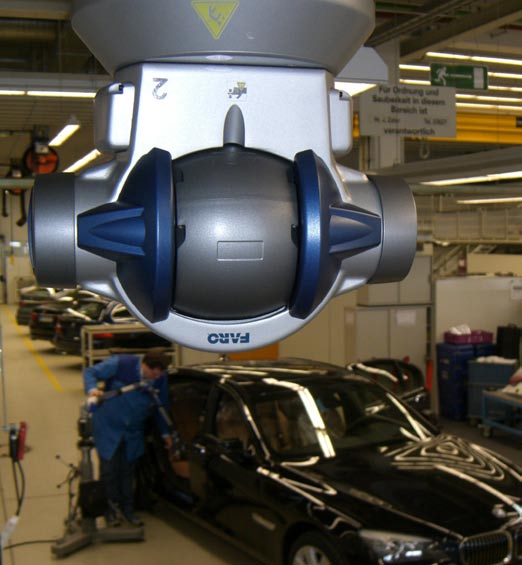 In cases where the item to be inspected can only be transported into the measuring area with great difficulty, if at all, the Track ScanArm also offers the possibility of going straight to the part, for example to the production line, in order to carry out the measurements in situ. Thanks to the portability of the system, the specialists in Geometric Integration can make considerable savings in terms of transport costs and time. And when in this context the analysis is carried out more quickly, it is of course also possible to respond more quickly to any inaccuracies, which represents a significant advantage particularly in the series production process. One essential bonus of this system is the option of using each of the products individuthese measurements, the system is particularly impressive not only for its mobility but also for perfect ‘job-sharing’: The measuring arm is used whenever measurements need to be taken in locations that cannot be accessed by the laser tracker.
The tracker is used, on the other hand, for measuring points at heights of up 3.0m which cannot be reached with the measuring arm. The combination of tracker, tactile measuring arm and laser scanner has proven absolute stood the testing in both Dingolfing and in Regensburg. Not least because transfer can be carried out anywhere and the system offers all degrees of freedom – so that there are no limitations. The specialists at BMW have also come to appreciate the mobility of the measuring system.
The Track ScanArm also plays a similarly important role for the Regensburg plant as a replacement for and a supplement to the underfloor measuring system, in order to avoid capacity bottlenecks. If the stationary measuring machine is busy, the FARO system offers
The Track ScanArm adds another element to the existing comprehensive array of measuring devices in Dingolfing und Regensburg, and quite considerably increases efficiency in the case of certain measuring tasks. On this basis, the metrologists can select and utilise the most effective measuring system available in each case, for any application. This also applies especially with regard to the combination of scanning and tactile measurement for large measurement volumes, and the possibility of mobile deployment on the production line.

Roland Schlüßl, Key Account Manager at FARO and responsible for BMW client support, sums it up as follows: “The experts in Geometric Integration measuring technology at BMW are quite satisfied with the Track ScanArm system. And it’s no wonder, as the automotive industry is virtually predestined for the combination of these measuring systems, because the components to be measured are too large for the measuring arm, and the laser tracker can do little on its own. Admittedly, we also learned quite a lot in the course of the installation process at BMW, and we were able to develop the Track ScanArm even further in the process. Now the package is absolutely ‘spot on’ and is already being used by various other car manufacturers.”
5 Good Reasons
… why you should consider the FARO Track ScanArm:
Combination of FaroArm and tracker: Large range, small details which are difficult to access, highest precision
Benefit from the high accuracy of both individual systems
While measuring with the arm it is not necessary to be in line of sight with the tracker. Thus you measure/ scan with real 6/7 free axes
Only one laptop necessary for the control of both products
Laser Tracker and ScanArm can also be used indivuaally
High Potential for Innovation
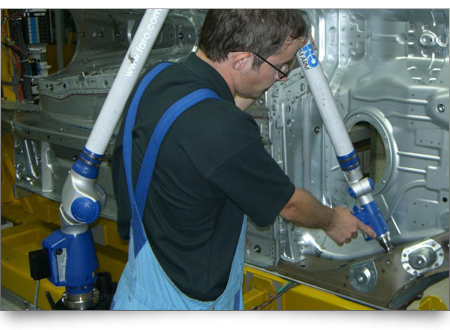
The FaroArm is able to convince users in everyday operation, thanks to its mobility and reliability.
A portable FARO measuring arm has replaced conventional gauges for measuring bolts at a major automobile manufacturer. The FaroArm Platinum not only provides the premium manufacturer with considerable savings potentials from the standpoint of costs, but is also convincing due to its mobility and reliability in two-shift operation.
A large number of innovative technologies are deployed during the manufacturing process of the new BMW 7 Series in Dingolfing (Germany). Among them is a mobile measuring arm of the FaroArm Platinum series with a measuring range of 3.7m, which has been in use since the beginning of 2008 for measuring bolts that are distributed throughout the entire car for, among other things, attaching cable harnesses and brake lines. Using the measuring arm also means that gauges are no longer needed. In addition, the new 7 Series is the first BMW vehicle in which the bolts are measured using the FaroArm. In addition to the Platinum series models, the FaroArm is also available as Fusion and Quantum model, as well as in five sizes with a spherical measuring range between 1.8 and 3.7 metres. Due to its capability to move in six or seven axes and its patented internal counterbalancing, the measurement system can also be used in difficult-to-reach places.
The system’s measuring handle is equipped with four buttons that are used to control the arm; acoustic feedback provides the user with information on the status of the measurement. The logic built into the arm uses rotary sensors in the joints to calculate the spatial position of the measuring probe. Overload sensors located in each joint warn the user when the arm is exposed to excessive handling forces, thus ensuring precise measurement results. The measuring arm consists of connection elements of a composite material developed by FARO – this not only permits a low weight (between 9 and 10 kg), but is also the basis for the excellent handling of the measuring system. In the course of production of the BMW 7 Series, random measurements of coarsethreaded bolts and earthing bolts are made on one vehicle per shift during the break, during which the system is at a standstill, so that production flow is not interrupted. The bolts are first measured in an inline measuring system by a robot with a laser sensor. In the next step, bolts that cannot be measured in this system because, for example, they are ‘hidden’ in the tunnel, are measured using the FaroArm.
To do this, the body shell is placed on a diverting frame and transported to a diversion and reworking workplace belonging to the floor assembly division in the production area. This is where the measurement technician first makes calibrations in the vehicle. Then he moves a sleeve over the bolt – and the measurement is already available. In other words, he did not have to touch the bolt. The approximately 60 bolts that are to be measured with the FaroArm Platinum are furthermore displayed by software that guides the user through the measurements. Compared to the previous method, this process also brings advantages in terms of time; as the gauges had to be inserted first.
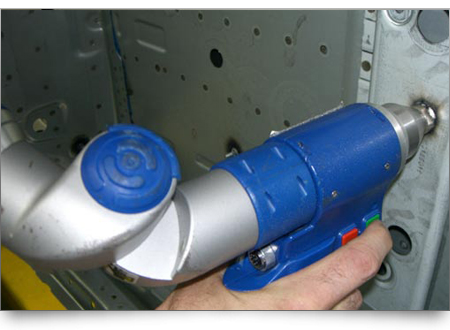
The measurement technician moves a sleeve over the bolt, which means
that he does not have to touch it.
Since work in Dingolfing is carried out in two-shift operation, the FaroArm is deployed twice a day. However, in another application it is only used every two months. Because bolt measurement with the inline measuring system is referenced measurement, the Dingolfing plant needs a system for comparison. They also use the FaroArm for this. In this context, all the bolts in an entire vehicle are measured. Then the measurement experts examine how the data behave in relation to one another and the inline measuring system is calibrated on this basis. The measuring arm replaces the measuring room in this case. In addition to advantages in terms of time, using the mobile measuring system gives automobile manufacturers the opportunity to replace their gauges. After all, they not only cost a large sum to purchase, but also require time-intensive tightening, including calibration in the measurement room, if the bolts are changed.
In the case of the 50 to 60 gauges that the BMW plant has used for these measurements so far, this results in a considerable savings potential. In contrast to the measuring methods used before, the FaroArm also allows for the determination of precise positions, whereas the gauges only showed the deviations. The mobility and reliability of the FaroArm Platinum also provide valuable benefits in the context of the resulting measurements. The measuring arm has certainly proven itself at the BMW plant, where eight other FaroArms are in use in other areas. It fully fulfills the task at hand, namely to use the portable measurement system to test whether the welded bolts are in the correct position.
As the measurement experts are also very satisfied with the service, it can be concluded that the FaroArm has fulfilled expectations. Moreover, the premium manufacturer has not only proven
its spirit of innovation in the new BMW 7 Series – which is impressive due to its elegant design and state of the art technology – but also in the ‘refinement’ of the mobile measurement system: In order to measure the bolt more quickly, the BMW technicians have built an adapter that can be screwed onto the front of the FaroArm. The ball with which the measurements are usually made is removed. The sleeve is precisely one-tenth larger than the bolts. The engineer only has to place it over the bolt and check whether it rests satisfactorily on the plate – then he can carry out the measurements which only takes only about a second.
More information
WWW.BMW.COM
About FARO
FARO (NASDAQ: FARO) develops and markets computeraided coordinate measurement
devices and software. Portable equipment from FARO permits high-precision 3D measurements and comparisons of parts and compound structures ,within production and quality assurance processes. The devices are used for inspecting components and assemblies, production planning, and inventory documentation, as well as for investigation and reconstruction of accident sites or crime scenes. They are also employed to generate digital scans of historic sites. Worldwide, approximately 10,000 customers are operating more than 20,000 installations of FARO measurement systems. The company’s global headquarter is located in Lake Mary, Florida/USA, its European head office in Korntal-Münchingen near Stuttgart (Germany). FARO has branch offices in Brazil, Canada, China, France, India, Italy, Japan, Korea, the Netherlands, Poland, Spain, Switzerland, Turkey and the UK.
FaroArm
The FaroArm product line consisting of Quantum, Platinum, and Fusion, are flexibly deployable, portable measuring systems for 3D measurements. They meet the high accuracy requirements posed by development and production. The FaroArm measures, digitizes, or creates a CAD component analysis right in production or during assembly. The measurement arms are available with six or seven axes and with four measuring volumes.
More information
http://europe.faro.com/products/metrology/measuring-arm-faroarm/overview
4 good reasons
The measuring arm can be mounted and operated very easily, regardless of the surface
being worked on.
Mobility: Large and heavy components must no longer be transported to the measuring machine. Quality control can be completed on-site with the measuring arm. A patented temperature compensator assures reliable measurement results.
Flexibility: Thanks to the use of multiple rotary axles, the measuring probe can be positioned at the point to be measured, even if it is difficult to reach.
3 Counterbalance: The internal weight counterbalance in the FaroArm enables measurements to be completed beneath its clamping frame and allows unencumbered work
Universal mounting: The measuring arm can be mounted and operated very easily, regardless of the surface being worked on.
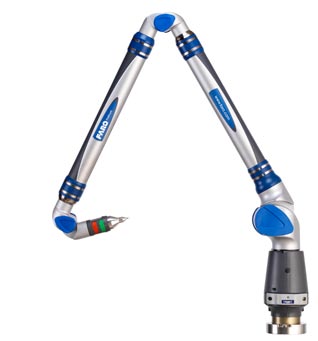
How the FaroArm works:
In order to measure a specific point, the measuring probe is positioned at the spot to be measured. The rotary angle encoder located in the arm calculates the exact position of the probe.
The Premier League – CPP use FARO Laser ScanArm
“It is the FaroArms versatile and portable nature that has led to this equipment becoming a key resource within CPP.”
Paul Cerisola, Quality Managery, CPP (Manufacturing) Ltd
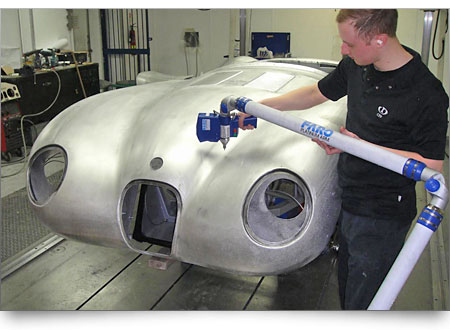
The Premier League – CPP use FARO Laser ScanArm
Article by Dave Tudor
Coventry is the historic home of the British automotive industry, although until recently the general trend has been one of decline. However, technologically savvy companies such as CPP (Manufacturing) are reporting healthy business levels. Already firmly established in the prestigious automotive market supplying high quality assemblies for premium brand companies, CPP is going one step further by undertaking the full vehicle production of the Spyker Aileron model at its Coventry-based facility. CPP was founded in 1995 by Brendan O’Toole and Darren Welsh and specialised in the supply of body panels for classic cars and lightweight alloy racecar bodies for the likes of Jaguar and AC Cobra – a service that it still provides today. From relatively humble beginnings, the company has evolved and is now considered a preferred partner to many of the world’s most exclusive and prestigious automotive manufacturers.
It is this experience and CPP’s ability in offering a complete engineering and coach building service that led to the company being awarded the contract to build 200 Spyker Aileron sports cars per year at its Coventry base.The company operates from its head office in Seven Stars Industrial Estate, and has four sites covering 80,000ft² in total. CPP currently employs 110 people with this projected to rise to 150 during 2010 to meet the demands of Spyker production and other customer orders. CPP endorse a policy of complementing its in-house skills with those of the many specialist suppliers in the Coventry area which allows them to provide a service that can be tailored to suit individual client requirements. Its reputation is built on marrying traditional skills with modern technology and manufacturing methods and in order to remain truly independent, CPP has a long established apprenticeship scheme to ensure continuity and longevity of its skilled workforce into the future. Some of the solutions offered by CPP vary from traditional sheetmetal work and component and vehicle prototyping to metallic arts and bespoke furniture with many projects utilising its full onsite engineering support team. Supporting this infrastructure is a dedicated quality assurance team maintaining the company’s ISO9001 and VW Group quality approval accreditations. CPP utilise Faro measurement technology to ensure the parts, and assemblies correlate to design specifications.
The Faro Scan arm uses laser technology to inspect parts quickly including in-situ on the production line should the need arise. CPP director, Matt Rose comments:
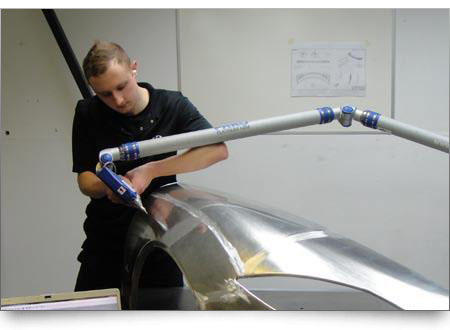 “Our multiple Faro measurement solutions allow us to verify that the quality of our parts and assemblies meet our customer’s high standards.” David Homewood of Faro adds: “CPP is a long standing Faro customer with whom we have an excellent relationship. I am inspired by a company that is bucking local and national trends and is rising from the decline of the local automotive industry like a Phoenix.” CPP’s long standing relationship with Spyker Cars started in 2000 and to date the company has produced more than 200 body shells across several platforms for the Dutch car company. As well as Spyker it also undertakes an extensive list of projects – often of a confidential nature – with other customers including Aston Martin, Bentley Motors, Rolls-Royce and Jaguar Land Rover. A common requirement across its entire customer base however is the need for shorter leadtimes, enhanced quality levels and competitive pricing. The company meets these challenges by fully optimising its cross functional, multi-skilled workforce and a result of this, coupled with the Spyker Aileron production, is CPP recently being awarded the contract to supply Aston Martin with the production Body-In-White vehicles for its definitive million pound sports car, the One-77.
CPP is also the approved constructor of Proteus Cars’ CType model where its key skills in sheetmetal work are supported with full product design and development, tooling design and manufacture, project management, quality control and inspection services to produce the complete ‘drive away’ vehicle. In terms of motor manufacturing, CPP also produce the Zagato GTZ, where the ‘donor’ vehicle is a Bentley Continental that is completely stripped down and re-built to a design created by the famous Italian marquee and manufactured to Bentley’s stringent build quality standards. Moving forward the company has solid plans to expand
its horizons, initially by the installation of a new press with a 3.6m working envelope, bolstering its manufacturing capabilities even further. CPP’s managing director Brendan O’Toole says:
“It is an industry perception that CPP offers an excellent world class coach building service and the reason for this is our ability to secure, retain and train our team. “The automotive world is changing and with the introduction of definitive cars such as the Spyker Aileron and Aston Martin’s One-77, CPP has honed its services to accommodate the developing technological advances. I simply do not accept we are witnessing the death of the UK’s automotive industry – we are at the beginning of a transition of change whereby exclusivity will grow and I believe Coventry will play an important and sustainable role due to generations of engineering and technological excellence.”. Doug is very happy with their decision to purchase the FARO system: “The FaroArm is helping Klarius to achieve its objective to be Europe’s leading emissions supplier, by providing rapid development of even complex parts, at a pace which consistently outdistances its self from the competition!” “The equipment is designed with ease of use in mind, and very user friendly and does exactly what we need in a quick and efficient manner. More importantly all our dealings with FARO and their people are always excellent and the service is second to none, they always are available to help as we learn to use the equipment.”
4 good reasons
The measuring arm can be mounted and operated very easily, regardless of the surface being worked on.
Mobility: Large and heavy components must no longer be transported to the measuring machine. Quality control can be completed on-site with the measuring arm. A patented temperature compensator assures reliable measurement results.
Flexibility: Thanks to the use of multiple rotary axles, the measuring probe can be positioned at the point to be measured, even if it is difficult to reach.
Counterbalance: The internal weight counterbalance in the FaroArm enables measurements to be completed beneath its clamping frame and allows unencumbered work.
Universal mounting: The measuring arm can be mounted and operated very easily, regardless of the surface being worked on.
Vodafone McLaren Mercedes: “Speed of what we do is what it’s all about”
Eliminating the barriers between inspection and production with FARO’s measuring devices speeds up manufacturing response times and increases car reliability at Vodafone McLaren Mercedes F1.
By Brendan Coyne, QMT, April 2011
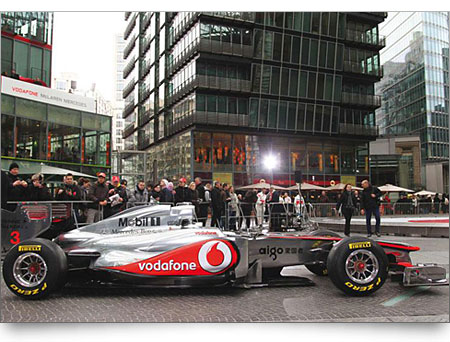
“Speed of what we do is what it’s all about,” says Simon Roberts, operations director for McLarenRacing. Simon is responsible for all the operations, from design of the F1 race cars, manufacturing, supply chain logistics, quality and service of the parts, getting everything out to the track. “To put it into context, if we take all the design changes, all the updates we do, and averaged it throughout for the year, it’s a design change every twenty minutes on a 24/7 basis. Basically, the car is never the same one week to the next. There’s always something new, something different. It may just be something small or it could be something major such as a complete change of bodywork – such as new front wings or new rear wings. This is where measurement technology provides accuracy and good data for the engineers to make decisions.
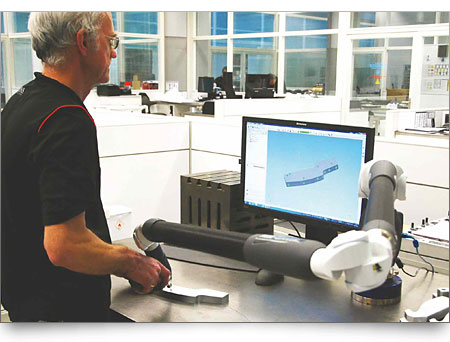
One of the very important things, particularly with the FaroArm and software, is that we can do things really quickly. There is no point in us having elaborate inspection processes that take 3 or 4 days of time. We are not going to wait for that. We would end up skimping and just measuring a few key points. With the non contact scanning devices on the Faro portable arms, we can actually see the surface. Without a laser scanner, its much more difficult to see the surface and interpret that data. One of the things we’ve been talking about at Vodafone McLaren Mercedes is moving the point of inspection to the job rather than inspecting in a separate department. There will always be a place for a CMM for small parts, racking them out – it’s more productive. But when you are measuring a chassis or patterns or moulds, if you can measure it in its fixture – then you can probably do something about it immediately.You’re not re-jigging it. You can get the engineer there. That’s how I see inspection evolving.
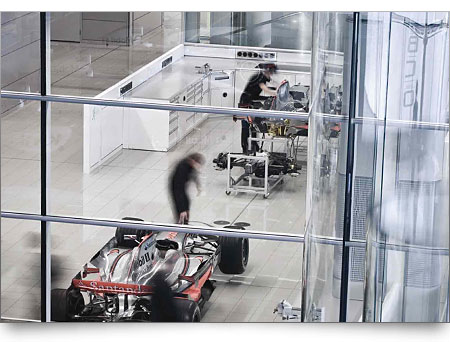
Workshop inspection
As mentioned, we’re at 24/7. All the composites, all the manufacturing, are four shift systems, day and night and over the week end. We just haven’t stopped. So it’s all its about time compression. Every hour a job’s delayed is an hour out of lead time.
About 2 years ago, composites (inspection) used to be in a room on its own, as is mechanical parts inspection currently. We’ve deliberately moved composite inspection out of its room and put it in the shop where the parts and the rest of the department are because we got fed up of having those conversations in production meetings: “Where are the parts? “ “Oh, they’re in inspection.” If you put inspection in the workshop, then the parts aren’t in inspection – they’re in the workshop. You then expect the production manager to know because it’s just another production process – whether he’s trimming a part or inspecting a part, its all under his remit. This works really well.
Having the Faro arms removes the barrier between production and inspection. That’s a huge step. Take a wall down and it makes a huge difference to hearts and minds. Some of our production machines are vast – 4 metre cube volume. With a portable measuring arm, operatives can walk into them and check a chassis whilst it’s on the machine without moving the chassis. You can verify it before you remove it, just in case there is a rework issue. This provides an independent check from the machine system. If there is something wrong with the production machining, which utilises a measuring head to check the part, you are simply going to repeat the error. Whereas, with the portable arm as an independent measuring system, you turn up, find the datum and measure to find the error. Because you can go round the part with the arm and keep re-datuming, it’s perfect for our complex shapes. This inspection advantage applies to both finished part and interoperational
checking.
Data driven inspection
We manufacture the chassis, transmission, everything except the engine which is supplied by our partner, Mercedes-Benz HighPerformanceEngines. For parts such as chassis and wings, it is essential that we know, and are confident about the shape and form. Without data, you cannot do this. Mclaren are a very data driven organisation. When the car is running on the track, we record magabytes worth of data. And that logic is also true when we are making a part. We don’t want to take off-the-cuff decisions about what type of tool to use. We want to know what the right tool is for a wing assembly, or the right tool technology for a chassis, and we only know that if we understand the limitations of what we do.
The right tool is defined at the design for manufacture stage. So this data, this knowledge has to feed back into design for manufacture.” Quality control manager Keith Holland explains, “Traditionally, metrology has been a big safety net set under a manufacturing area, catching all the bad apples as they go through. What we try to do here is to build quality into the start of the process.” Simon Roberts continues, “Bear in mind, we make very low quantities. So for us, sixoff could be the full quantity of a component. For example, we make only four chassis or six wishbones and then the design will change. So you haven’t got time to do traditional statistical process analysis. We do stats analysis, but you have to do it with small sample sizes and you have to understand the limitations of that. Our approach tends to be more generic. What we are trying to do is to understand the yield of a process in its totality. We want to know what the yield of wishbone manufacturing is. When we identify specific issues, then we’ll change things – process, tooling or techniques – to eliminate them. If you are only going to make six components and you make 3 scrap ones, then you’re having a pretty bad day. If you make 20,000, three scrap are in the noise. There is variability – we make mistakes, machines don’t exactly follow CAD, material is not always what you thought it was, things go wrong.“
Keith Holland comments, “A lot of parts have a life cycle, so we need to build a certain amount in the knowledge that we have a certain amount of kilometres to fill through the year.” Simon Roberts continues, “Like aircraft, all the structural parts are serial numbered and they are all “lifed”. They all go through various proof testing and NDT operations as part of their manufacturing process. Part of their servicing is to bring them back into the factory and have them re-inspected from an NDT point of view and reproofed.
Proactive measurement
The drive for data has evolved over quite a long period of time. Certainly, in the last 8 years, inspection has moved from being a safety net to being a proactive force with the organisation. The resource restriction, which came into effect last year, has also caused us to look long and hard at how we spend our money. In the past, we have sometimes been able to buy our way out of trouble: if the process wasn’t very robust or if scrap parts had been made, you just bought more. We can’t afford to do that now. We are regulated to how many people we employ and how much cash we spend. So spending money on bad parts we’ve spent the last two years raising our game in terms of our own understanding, and the engineers understanding, of what yield is all about and what the benefits are of having robust processes that give you exactly what you want when you want. It’s about making parts right first time – zero defect manufacturing is the goal.
To process FMEAs, which is a great help. It gets you thinking in a different direction. We have a very good mechanism for recording faults. For faults seen on the race car – for example, if something doesn’t work the way you expected or fails before you expected – we have a very sophisticated mechanism for reviewing that. It’s a real-time close loop system which leads right back to design through manufacturing. We also have an internal non conformance system for parts we make and for parts we buy in, which is very proactive. It looks to eliminate waste in its broadest sense – in time, material or cash. Together, all this forms part of what you would call our quality system.
Hit it hard
Typically, every year, we have some two or three really difficult quality problems that are not just as simple as redesigning a part, or changing the source, or changing the manufacturing process. You might not even understand why a part doesn’t perform the way you expect. Over the years, our experience has taught us that if you look back in hindsight, you can often see early signs of those things. As a result, we call them Achilles Heels. They are things that you thought were OK but, in hindsight, weren’t. They normally end up being very long running and expensive. So our approach now, when we think we’ve got something like that – when we get that uneasy feeling when we see all the data – is hit it hard, hit it with really good people who have got all the skills, tools and techniques and don’t let it go till it’s fixed. A good example of that was when we lost the World Championship in Brazil 2007, where we lost gears for 30 seconds on Lewis Hamilton’s car in the last race of the year. Eventually we found it through design of experiment and sticking with it, looking at data and trawling through everything you know and everything you think you know.
Six sigma?
Six sigma was born out of the electronics industry, with companies such as Motorola. Today, these companies operate at 8 and 9 sigma levels. McLaren aren’t a six sigma company and there’s a reason for that. We do have six sigma black belts and green belts. You could very easily convince yourself that, if we were six sigma, all this stuff would go away. But there is a problem with that and it’s to do with complexity. When you multiply sixsigma quality by our levels of complexity, you very quickly get to a condition where there will be a determinate number of failures. We have studied that in depth. When we looked at our processes for the assemblies we make, we actually run around four sigma, but individual parts are generally in excess of six sigma. It’s that fact that you multiply up – if you build a F1 gearbox with six sigma parts, you don’t then get a six sigma gearbox assembly. So we can’t sit here and say our race car is a six sigma product. For us, a defect is anything that means a car doesn’t perform to the ultimate. Reliability is half the battle, you’ve also got to create a fast car and have the skills (strategy and drivers) to race well.”
About Vodafone McLaren Mercedes
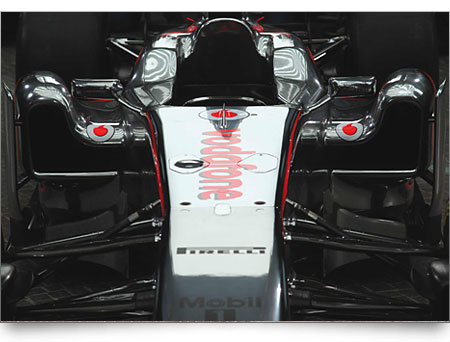
Since its foundation in 1966, the McLaren Formula 1 team has become one of the most successful and groundbreaking teams in grand prix motor racing. McLaren Racing is the nerve-centre of the racing operation, housing the extensive design office, 60-per-cent-scale windtunnel, manufacturing plant, fabrication facilities and build stations that dovetail together to create some of the most iconic Formula 1 cars in the sport’s history.
The McLaren Formula 1 team has won four consecutive Drivers’ and Constructors’ Championships (1988-1991) and secured eight Constructors’ World Championship titles, the first of which was in 1974. Today, the team has a record 12 Drivers’ World Championship titles.

