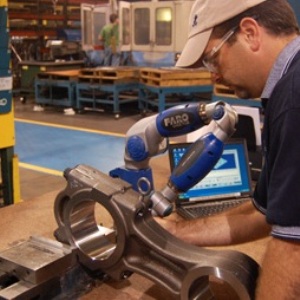
Identifying defective parts from suppliers upon arrival allows companies to establish and maintain strict quality standards. Implementing a comprehensive incoming inspection process prevents defective parts from making it to assembly, eliminating costly scrap and rework later.
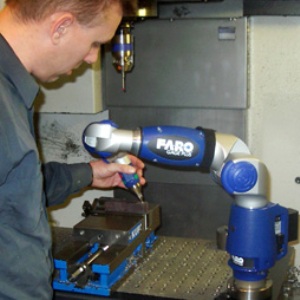
By integrating portable CMMs from FARO, such as measuring arms, into the receiving inspection process, operators have a quick and efficient way to determine whether or not these parts meet specifications and design requirements.
Jaguar Gains Speed and Precision
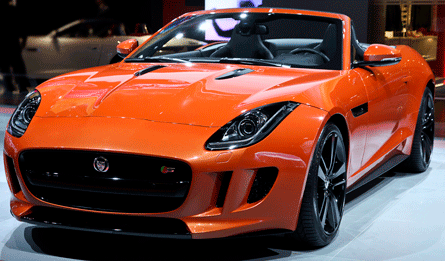
Faro develops and markets portable CMMs (Coordinate Measuring Machines) and 3D imaging devices to solve dimensional metrology problems. Technology from Faro permits high-precision 3D measurement, imaging and comparison of parts and compound structures within production and quality assurance processes. Faro devices are used for inspecting components and assemblies, production planning, documenting large volume spaces or structures in 3D, and more. Faro’s 3D measurement technology allows companies to maximise efficiencies and improve processes.
Jaguar Land Rover (JLR) is the UK’s largest automotive design, engineering and manufacturing employer and operates from 5 sites in the Midlands and the North of England. To help satisfy the rapidly growing global demand for its cars, JLR plans to deliver 40 significant product actions over the next five years.
Currently exporting almost 80% of its production to 101 markets worldwide, Jaguar Cars’ impressive Castle Bromwich factory handles body stamping operations, body assembly, paint and trim and final assembly for the Jaguar XF, XK and XJ models.
The meticulous quality standards administered throughout the Castle Bromwich site are reflected in the thorough dimensional inspection routines undertaken on the facilities manufactured car bodies. Jaguar Cars, Castle Bromwich BIW Supervisor, Martyn Smith explained. “In addition to displaying the required aesthetic and aerodynamic qualities, modern automotive bodies are critical structural members. They perform a wide range of important functions, from helping to reduce noise and vibration, to protecting the car’s occupants in the event of a crash.”
“The monocoque nature of modern car bodies also means that they act as the platform from which major components such as the suspension, engine, gearbox and axle are attached. Also, as a car’s body is its largest component, any slight inaccuracy or miss-alignment in a given position can be greatly magnified in other locations.”
“To help guarantee the highest standards of quality and to ensure strict adherence to dimensional specification, we remove a percentage of assembled bodies that are fitted with doors, boots and bonnets, from our production lines, we then carry-out detailed dimensional inspection routines. In addition to using our Faro equipment for the validation of BIW structures, it is also used for measuring panels in both pre-production and production runs. The outstanding levels of accuracy and repeatability that we are able to achieve through our use of FaroArm Platinum and Faro Laser Line Probe, ensures that we can detect micron deviations from our CAD models.”
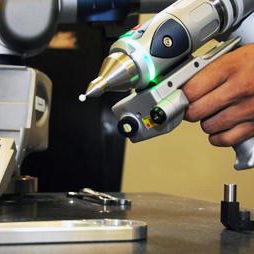
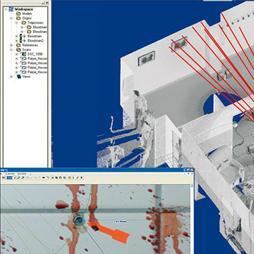
“In addition to the advantages gained by using the FaroArm Platinum tactile probe, we are able to quickly attach our Faro Laser Line Probe to the FaroArm, this gives us high-precision, non-contact 3D scanning capabilities. The advanced ScanArm combination is able to rapidly take millions of data points, then, as well as showing numeric values, Faro’s user-friendly software displays any deviation from our CAD models. This information is provided in a colour graphic format that is extremely easy to interpret. In essence, the areas of the measured part that are shown in green are within tolerance, whilst red indicates high points and blue low points.
“An example of the use of our FaroArm Platinum and ScanArm: following a dimensional inspection, a mounting bracket for a rear seat was found to have been located marginally from its nominal position. Although still within tolerance, we have been able to take immediate remedial action. In this instance, the portability of our measurement arm allows us to take the equipment to the shop-floor and precisely measure the relevant mounting bracket fixture. We can then make the necessary adjustments to the fixture to ensure that all subsequent brackets are attached in the nominal position. Other uses include ensuring the optimal gap and flush condition of doors, boots and bonnets.”
“The planned launch of new Jaguar models and the anticipated introduction of variants of existing cars means that the company’s already rapid speed of change is due to accelerate even quicker. In addition to their accuracy and ease of use, the speed of our Faro Platinum Measuring Arms and ScanArms help us to keep pace with our current throughput of work and will help ensure that we are able to handle the expected volumes of future inspection routines.”
FaroArms are a range of portable coordinate measuring machines (CMMs) that allows easy verification of product quality by performing 3D inspections, tool certifications, CAD comparison, dimensional analysis, reverse engineering, and more.
Used extensively throughout the automotive industry, FaroArm Platinum’s ±0.029 mm accuracy renders traditional CMMs, hand tools and other portable inspection equipment obsolete. Anyone, anywhere can now inspect, reverse engineer or perform CAD-to-Part analysis on components, fixtures and assemblies with previously unheard of levels of precision.
The addition of the Faro Laser Line Probe to the FaroArm adds unparalleled non-contact 3D scanning capabilities. This arrangement provides detailed measurement of surface form, making the ScanArm the perfect combination of a contact and non-contact portable CMM.
Portable CMMs from FARO simplify the implementation of geometric dimensioning and tolerance (GD&T) and provide efficient, easy-to-use solutions for CAD-based 3D inspections and nominal comparisons. With their versatile contact and non-contact measuring capabilities, tools such as the FaroArm, Faro ScanArm and Faro Laser Tracker can utilise CAD overlays to check complex geometry against design or CAD comparison to evaluate deviations in surface form and ensure that every part is machined to an exacting tolerance.
Martyn Smith concludes. “Before the use of our original FaroArms we inspected our range of bodies and panels in a traditional, relatively labour intense manner, by using a range of fixtures and measuring instruments. Following our implementation of Faro products we were able to vastly improved our accuracy capability and slash our inspection times. In fact, routines that previously took 8 hours to complete could be done in 1 – 2 hours with the help of ‘Gold’ FaroArms. Prompted by the success of our first FaroArms, our purchase and use of our premium quality Platinum FaroArms and ScanArms has further improved both our accuracy capability and speed of operation.
“Faro products continue to make a significant contribution towards upholding Jaguar Car’s exacting quality standards. They have also proven to be an ideal, reliable link between our design, analysis and manufacturing departments. As the introduction of new models increases our BIW workload, to make certain that we are able to keep up with the increased throughput we intend to purchase further Faro systems.”
Commenting on the company’s current success and anticipated growth, Dr Ralf Speth, Jaguar Land Rover CEO, recently said, “Innovation in design, engineering and technology is at the core of our business and for the UK, this means we will continue to invest in new products, develop new technologies and enhance the skills of our employees.”
“The launch of our latest Jaguar models, including the new XF Sportbrake and F-TYPE, means it is a very exciting time for Jaguar. These new models will attract new customers to the brand as we look to expand our global reach and further enhance our position in the market.”
Highest quality requirements in metalworking
To meet high quality requirements, the quality department of KLB Blech in Form GmbH relies on FARO portable measuring arms. Significant time and cost savings can be made, particularly in the receiving department, in in-process and final inspecation as
well as in support of production and engineering.
The complexity of the metal parts produced, in terms of their geometry and the accuracy required has steadily increased in recent years. Expectations in terms of services have also increased, and the scope of measurement and test documentation plays an ever increasing role. Investment in the appropriate technology is therefore essential. The gap between the measurement effort and meaningful measurement results, which has become bigger in recent years, could not always be guaranteed with the previous measuring methods. The company KLB uses the Faro Fusion measuring arm to measure typical welded parts, punched and curved parts and for testing prototypes, among other things. The large amount of time needed for re-measuring various details of a component made the decision in favour of the 3D measuring system easier. For example, in the case of medium-sized welded parts (dimensions: L: 2133 mm; W: 940 mm; H: 1000 mm), with subsequent mechanical processing, hole patterns on all sides are checked with appropriate positioning tolerances. Thanks to the FARO Fusion the measuring effort has been reduced by up to 30-40 % compared to the conventional methods.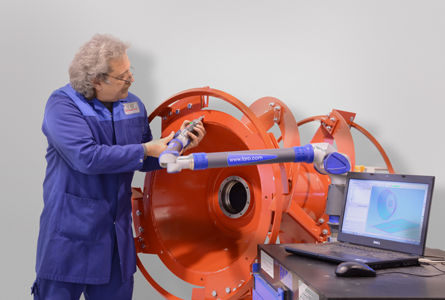
Measuring and analysis mistakes in high volumes of data have almost been eliminated thanks to the possibility of specifying tolerance ranges and subsequently analysing them automatically. Furthermore the measuring system is also used to record complex components for which there are no production documents available. In reverse engineering, for example, the documented measurement data are used as a basis for the design and production of construction plans. This is often particularly useful for old components, as in many cases there are no plans available for these. This means the replacement parts produced can be installed by customers without any problems, that is to say, without the additional effort of lengthy adaptations and checks.
The 3D measurement data also eliminate longlasting and possibly inaccurate manual measurement.
With the help of the CAM2 Measure 10 software from FARO, complete 3D documentation can be created, saving time and money in the quality department. Thanks to the software’s detailed measurement reports, the tolerances of various components can be quickly and clearly recorded.
The FaroArm Fusion also helps to reduce the measurement effort to the absolute minimum. Manfred Brüderle, quality manager at KLB Blech in Form GmbH, is convinced: “Our practical experience shows that we have generated considerable benefit and hence advantages in a variety of internal processes thanks to the use of FARO Fusion.”
More flexible and precise inspection at Herbert Maschinenbau thanks to the FARO Gage
Its main area of activity is the development, design and manufacture of system solutions for tyre production. The range of services include machines and tools for both tyre construction and vulcanisation. Herbert provides complete solutions for the global tyre industry. The diverse product range includes tools and machines for the manufacture of scooter and bike tyres,through to tyres with a diameter of more than four metres for special-purpose vehicles. As the quality of the products is vitally important
to the company, measuring technology has been used at Herbert Maschinenbau GmbH & Co.KG for a century. Hand-held measuring devices, callipers,fixed CMMs and CNC-controlled measuring systems in processing machines are all used to carry out measurement tasks. At the end of 2011 the company decided to use portable measuring technology from FARO. A particular focus was the improvement of the monitoring of incoming goods and interim checks in the production process.
In the search for a suitable solution, the company from Hünfeld collected information on the subject at the CONTROL trade exhibition in Stuttgart for example, where they found out about the innovative products from FARO. In choosing a suitable measuring system the following criteria were particularly relevant: precision, portability and simple,
user-friendly operation of the equipment.
The FARO Gage has been used in the area of goods incoming inspection as well as for interim checks of products produced in-house since the beginning of 2012.
The Gage is particularly well suited to these tasks due to its flexible application options.
The primary job is to check the quality of incoming goods and the inspection of parts in order to ensure optimum processing.![]()
With this application in particular, a 40% to 50% time saving has been achieved through the use of defined measuring procedures or macros, known as predefined measuring processes. It is also especially important for Herbert Maschinenbau to be
able to replicate and verify the quality and fit of purchased parts, which can be documented and checked by means of reports. This check must be carried out
quickly and efficiently, before the parts are used in production and assembly. Furthermore, there are plans to use the FARO Gage in other areas as well.
Measurement tasks that have been difficult to implement up until now due to their complexity, are now easier to manage thanks to the Gage. The measuring system developed by FARO now enables the company not only to measure complex
parts and components, but also offers the customer the opportunity to check the quality of the parts produced by means of direct model comparisons. Herbert has invested ten million Euros in stateof-the-art technology in the past few years alone.
“We are the number one worldwide in terms of quality and market share in mould making,” says the company’s managing partner Matthias Walter in an
interview for the BVMW Enterprise Award.
