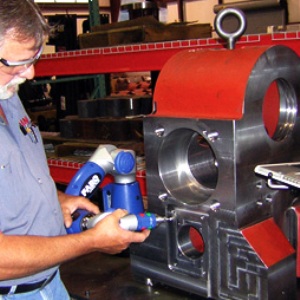
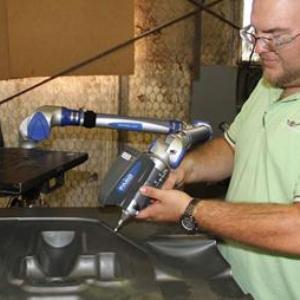
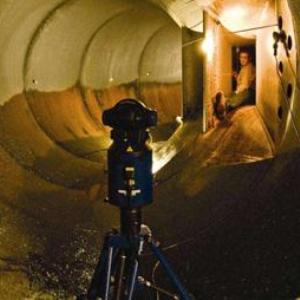
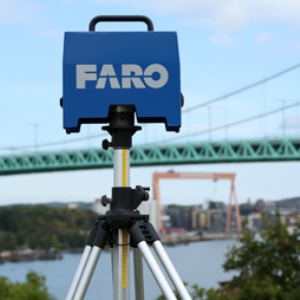
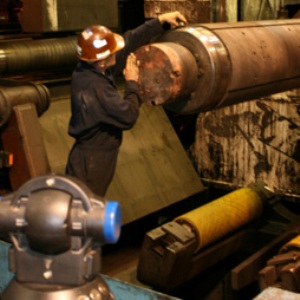
Machining accurate parts quickly is critical to the success of any job shop. In order to improve efficiencies and turnaround times, many have adopted portable CMMsfrom FARO, such as laser trackers and measuring arms. These are used to streamline inspection processes, dimensional analysis and 3D modeling of parts such as tooling, improving the overall quality of machined parts.
Solutions such as the FARO Laser Tracker and FaroArm can further improve the operation of machine tools and CNC machines by providing in-process and on-machine inspections which significantly increase production efficiencies, saving significant time and money.
Highest quality requirements in metalworking
To meet high quality requirements, the quality department of KLB Blech in Form GmbH relies on FARO portable measuring arms. Significant time and cost savings can be made, particularly in the receiving department, in in-process and final inspecation as
well as in support of production and engineering.
The complexity of the metal parts produced, in terms of their geometry and the accuracy required has steadily increased in recent years. Expectations in terms of services have also increased, and the scope of measurement and test documentation plays an ever increasing role. Investment in the appropriate technology is therefore essential. The gap between the measurement effort and meaningful measurement results, which has become bigger in recent years, could not always be guaranteed with the previous measuring methods. The company KLB uses the Faro Fusion measuring arm to measure typical welded parts, punched and curved parts and for testing prototypes, among other things. The large amount of time needed for re-measuring various details of a component made the decision in favour of the 3D measuring system easier. For example, in the case of medium-sized welded parts (dimensions: L: 2133 mm; W: 940 mm; H: 1000 mm), with subsequent mechanical processing, hole patterns on all sides are checked with appropriate positioning tolerances. Thanks to the FARO Fusion the measuring effort has been reduced by up to 30-40 % compared to the conventional methods.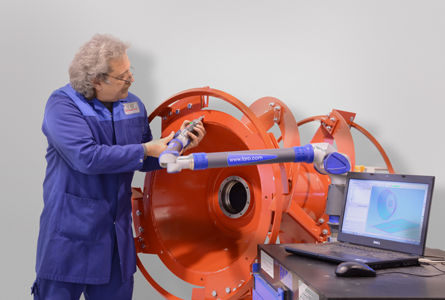
Measuring and analysis mistakes in high volumes of data have almost been eliminated thanks to the possibility of specifying tolerance ranges and subsequently analysing them automatically. Furthermore the measuring system is also used to record complex components for which there are no production documents available. In reverse engineering, for example, the documented measurement data are used as a basis for the design and production of construction plans. This is often particularly useful for old components, as in many cases there are no plans available for these. This means the replacement parts produced can be installed by customers without any problems, that is to say, without the additional effort of lengthy adaptations and checks.
The 3D measurement data also eliminate longlasting and possibly inaccurate manual measurement.
With the help of the CAM2 Measure 10 software from FARO, complete 3D documentation can be created, saving time and money in the quality department. Thanks to the software’s detailed measurement reports, the tolerances of various components can be quickly and clearly recorded.
The FaroArm Fusion also helps to reduce the measurement effort to the absolute minimum. Manfred Brüderle, quality manager at KLB Blech in Form GmbH, is convinced: “Our practical experience shows that we have generated considerable benefit and hence advantages in a variety of internal processes thanks to the use of FARO Fusion.”
Geared up for success
SANDERS Gears Castings Machining prides itself in over 165 years of experience and is the expert in manufacturing non-standard gears, special castings and 5-axis machining of large and complex parts. Entirely in accordance with customer specifications: made to measure goods from a singular element to small series. SANDERS offers an excellent combination of top quality products and reasonable prices, with swift delivery. Founded by a blacksmith in 1846, it has grown to become a leading national and international supplier of quality services in the fields of gears, non-standard drive systems and specialty castings. They offer engineering and production of all types of gears, gear racks and gearboxes. SANDERS also has a foundry and complete machine shop for the production of machined castings like pump casings, impellers and gearboxes. They cast grey and ductile iron and special alloys like wear-resistant Nihard and tempered Ductile Iron suitable for thin-walled casting.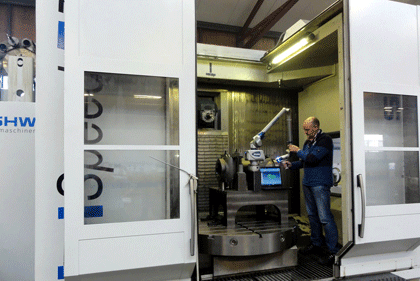
SANDERS’ heritage continues to be evident in the iron foundry and machine factory, but the company knows that the past means nothing if you don’t keep up with the future. That’s why they recently acquired a Faro Edge to support a broad range of activities across all the company’s departments.
“Our customers have one thing in common. They need repairs or replacements of gears, or other drive system components that are not available off-the-shelf. We are talking about straight, helical or spiral bevel gears and crown gears up to 5 meter and gear racks up to 15 meter” says Director Olivier Stapper. “Since we purchased the Edge we’ve been able to speed things up incredibly and we can handle large parts much better” says Stapper with enthusiasm. The Faro Edge also allows the SANDERS team to accurately measure large castings and casting patterns. When new parts are required for cranes, bridges or ships, on-site assessment and minimum down time are critical. Here the portability of the Edge gives SANDERS a major competitive advantage and is creating new business opportunities. “It allows us to measure complex shapes faster and more precisely, it’s easy to transport and it syncs with our CAM2 Measure software. Our engineering department has been using the FaroArm Quantum since 2009 and is very satisfied with its qualities. This made us purchase the new Faro Edge and again we experience time and cost-savings.” In the foundry and the machining shop, inline quality control is a major productivity booster breaking down the barriers between the traditional phases of manufacturing and quality control. Using the Edge, workers can easily measure complex products and react immediately to correct inaccuracies before final assembly. If any inaccuracies occur,
our personnel can respond directly and make corrections. As a result, we have less rejects and a higher quality product.
“A true innovation compared to the FARO Quantum is the built-in touchscreen and on-board operating system! We never know where we will use the Edge next; this can be everywhere in and around the work place, and at clients’ sites. The FARO Edge ScanArm also enables us to measure parts on location, which significantly saves time.” “The combination of our new FARO Edge and our traditional expertise in design and reverse engineering services is proving to be a great ROI booster for SANDERS and our customers alike,” concludes Director Stapper.
More flexible and precise inspection at Herbert Maschinenbau thanks to the FARO Gage
Its main area of activity is the development, design and manufacture of system solutions for tyre production. The range of services include machines and tools for both tyre construction and vulcanisation. Herbert provides complete solutions for the global tyre industry. The diverse product range includes tools and machines for the manufacture of scooter and bike tyres,through to tyres with a diameter of more than four metres for special-purpose vehicles. As the quality of the products is vitally important
to the company, measuring technology has been used at Herbert Maschinenbau GmbH & Co.KG for a century. Hand-held measuring devices, callipers,fixed CMMs and CNC-controlled measuring systems in processing machines are all used to carry out measurement tasks. At the end of 2011 the company decided to use portable measuring technology from FARO. A particular focus was the improvement of the monitoring of incoming goods and interim checks in the production process.
In the search for a suitable solution, the company from Hünfeld collected information on the subject at the CONTROL trade exhibition in Stuttgart for example, where they found out about the innovative products from FARO. In choosing a suitable measuring system the following criteria were particularly relevant: precision, portability and simple,
user-friendly operation of the equipment.
The FARO Gage has been used in the area of goods incoming inspection as well as for interim checks of products produced in-house since the beginning of 2012.
The Gage is particularly well suited to these tasks due to its flexible application options.
The primary job is to check the quality of incoming goods and the inspection of parts in order to ensure optimum processing.![]()
With this application in particular, a 40% to 50% time saving has been achieved through the use of defined measuring procedures or macros, known as predefined measuring processes. It is also especially important for Herbert Maschinenbau to be
able to replicate and verify the quality and fit of purchased parts, which can be documented and checked by means of reports. This check must be carried out
quickly and efficiently, before the parts are used in production and assembly. Furthermore, there are plans to use the FARO Gage in other areas as well.
Measurement tasks that have been difficult to implement up until now due to their complexity, are now easier to manage thanks to the Gage. The measuring system developed by FARO now enables the company not only to measure complex
parts and components, but also offers the customer the opportunity to check the quality of the parts produced by means of direct model comparisons. Herbert has invested ten million Euros in stateof-the-art technology in the past few years alone.
“We are the number one worldwide in terms of quality and market share in mould making,” says the company’s managing partner Matthias Walter in an
interview for the BVMW Enterprise Award.
The certainty of “flying high”
Mecat 5 is a small but active company based in the heart of Piedmont, which offers cutting-edge quality and technological contents in the special machine production sector, as well as mechanical processing for third parties. Isidoro Mirabella, the owner of the company, specifies: “We currently work mainly for large industrial groups, for example the Saet Group, the Tenova Group, Emco Mecof and Meccanica Nova, which, in turn, export their machines worldwide.” To work with such large and prestigious companies, it is necessary to produce high-tech products, observing the strictest precision parameters and respecting very narrow clearances.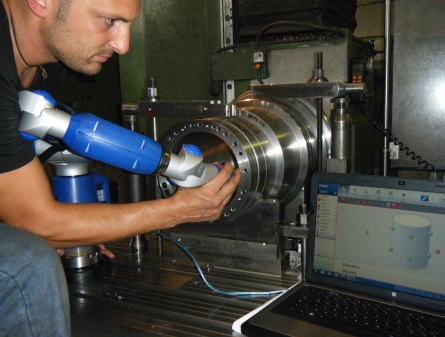
Until just a few months ago, the Mecat 5 staff used an old-generation measuring tool with limits in terms of size, accuracy and data analysis. “To overcome these issues”, continues Mirabella, “and to be more competitive in one of the sectors that is potentially most interesting for us, and by that I mean aeronautics, we decided to invest in a modern instrument with advanced, start-of-the-art technology.”
In fact, Mecat 5 recently produced special equipment for REV Aviation S.p.A. – based in Chivasso, Torino – that Alenia uses to create nacelles for new Boeing 777 and 767 aeroplanes. “In addition to the production of parts, REV Aviation requires the respective dimension testing and inspection. Our need to use an adequate device derives from our client’s specific request.”
The instrument in question is a FARO Gage measuring arm, a portable coordinated measurement machine (CMM) with a work volume of 1.2 m, acquired by Mecat 5 at the start of 2012. Mirabella explains: “The FARO Gage is a portable 3D device with next-generation technology that can be brought to the worksite and can replace all other traditional manual measuring instruments thanks to the rich ‘library of instruments’ provided by the specific control software and report processing.”
Mirabella illustrates the results already obtained and the next goals for the use of the FARO device: “We can take advantage of the measuring arm’s full potential with the second series of aeronautical details to inspect. In any case, the FARO Gage has already shown that it can be particularly effective, with much better services than traditional instruments.”
The instruments allow measurements to be taken with a repeatability error of 0.018 mm in reference to the maximum width of the probe. Its wide range of probes and temperature and overload sensors also allow thermal changes to be “felt” and reaction to the improper use of the instrument thanks to its excellent precision.
Two of the most important advantages are flexibility and transportability. Isidoro Mirabella confirms and concludes: “The Gage allows us to easily perform direct measurements ‘on the part’ before taking it off the machine tool, reducing impact and defining ‘safe and repeatable’ processes from the point of view of size and precision.”
Brilex Improves Quality Program with FARO’s “Game Changing Technology”
Metal Fabrication / Inspection – Alignment & Verification
Brilex Industries has established itself as a worldwide source for fabricating, machining, and complete machine assembly. Founded in 1996 by two brothers, Brian and Alex Benyo, Brilex has become known as one of Youngstown, Ohio’s most aggressive and fastest growing companies. The company has grown to a position of leadership in its industry through proven performance, dedication, and continual investment in its people, facilities, and advanced equipment – providing both themselves and their customers with the advantages needed to compete in today’s global market.
With an aggressive and knowledgeable management staff focused on quality, efficiency, and on-time reliability, Brilex Industries (www.brilex.com) has become a preferred full service supplier to many leading OEMs and end users in the metals, rubber, plastics and glass, energy and power generation, and other capital equipment industries. 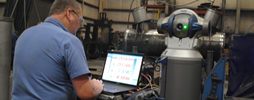
Problem
As expected for a manufacturer that supplies such a large range of industries and customers, the parts that Brilex works with everyday have an equally large range of size. Parts can range anywhere from as “small” as 30 pounds up to 70 tons. These parts tend to be medium to large fabricated and machined and/or assembled products such as various housings, gearboxes, platens, bearing races, scissor lifts, shredders, transfer cars, pressure vessels, chocks, bushings, work roll shafts, turbine components, and more.
Traditionally, Brilex used an assortment of tools in order to measure these various parts as it would be difficult for one tool to be the answer for all of their needs. They used OD (outside diameter) and ID (inside diameter) micrometers, height gauges, bore gauges, calipers, and other similar hand tools.
For Brilex, like many manufacturers, time and capability are always an issue. Over the past few years, the products the company builds and works with have become increasingly large and complex. In addition, many customers now require extensive documentation packages with complete traceability of material and dimensional resugalts.
The measurements obtained from traditional tools were sufficient, but were time consuming considering the increasing complexity of the parts and required multiple setups to measure all of the critical dimensions – if not impossible.
Solution
Brilex needed a better solution, a solution that could answer both their expanding need for quality and their ever-present need for time. Their answer came from FARO. The portable CMMs provided by FARO enable Brilex to perform many of the inspections they require with much greater accuracy and repeatability in a fraction of the time. Where it was not always possible to get all of the measurements they needed using past methods, they can now be achieved using FARO.
Brilex chose FARO not only for the time savings and the improved accuracy their devices provide, but for FARO’s industry reputation. The FARO equipment has even generated a great deal of excitement in Brilex’s customers when they visit and see them in action.
There was a learning curve in implementation of the new technology, especially in changing the mindset of those accustomed to using conventional measurement tools, but the combined training and support provided by FARO made this fairly seamless. That support was provided by local Account Managers Trevor Murcko and Eric Boyer as well as Applications Engineers and online support. Their assistance helped to show the benefits of reducing inspection time and proving the results that enabled Brilex to change their processes and improve their overall quality.
Brilex uses both the FaroArm and the FARO Laser Tracker ION on a daily basis to verify setup, in fabrication inspection, and during final inspection. A portable measurement arm, the FaroArm is used mostly on parts where GD&T is called out or in situations that may require additional setups. The FaroArm can be placed directly on the part or set on an inspection table and measuring can be started without having to setup or level the part being inspected. The scanning feature is used, for example, to check the profile of a casting and then compare it to the CAD file to assist manufacturing. The flexibility and portability provided by FARO are key and many of the software features in CAM2 are huge time savers for Brilex.
The parts checked by Brilex with the FARO Laser Tracker are generally those that are in excess of 20-ft long. Such parts typically require specific flatness tolerances. In other cases, such parts will have faces to be machined and the Tracker is used to verify that proper stock allowances exist. In some cases, subject parts have specific angles that are required to be held or machined. Another advantage of the Tracker is that it is very accurate in verifying specific locations over a long distance that must be held. Regardless of the length of the part, the Laser Tracker can be used to verify all features either in a single setup, or in multiple setups. If multiple setups are required, reference points can be established during the first setup, then the Tracker is then moved to a new location and the reference points are picked up from the first setup and used for another set of measurements.
The FARO ION allows Brilex to check dimensions over greater distance and to inspect geometric fit, form, and function items that would otherwise be extremely difficult and cumbersome to evaluate.
Bud Geddes, Manager of Manufacturing at Brilex, said, “The most significant advantage of a laser tracker versus a conventional laser measurement system is the ability to establish datum points on the work piece being evaluated and leapfrog the tracker around the work piece. Doing this allows the user to measure relationships between features that would otherwise not be possible.”
“Some of the products we manufacture are fairly large and expensive,” said Dan Hall, the Quality Control Manager at Brilex. “When mistakes cannot afford to be made, we have used FARO, specifically the Laser Tracker ION, to ensure machine tool and part alignment prior to machining critical features.”
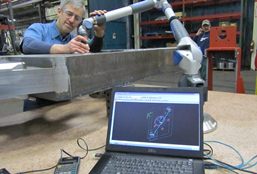
Return on Investment
For Brilex, their FARO solutions have improved their capability and confidence as well as the quality they deliver to their customers. FARO provides Brilex consistency in their results from inspection and this, in turn, allows the company to continually improve their quality program.
Alex Benyo, VP of Brilex, added, “The addition of FARO equipment is just another example of how Brilex continually makes investments in technology and resources to be best in class.”
As an example of real return, a part that had previously taken an average of 5 hours to inspect, can now be inspected in less than 2 hours using FARO due to the time saved not having to retrieve and calibrate or to do additional setups with all of the other measuring equipment they used previously. Most of the products Brilex manufactures are not repeat production, but when they do work with more than one part, the time saved using FARO is also reduced.
“Having FARO instills a sense of confidence in our customer,” said Mr. Hall. “Having the ability to assure dimensional conformance of large products with stringent quality requirement has definitely played a role in the placement of several new orders. But, the greatest benefits we have realized are the time savings and the improvement in our ability to measure large fabrications – and the added confidence of our customers.”
Brian Benyo, Brilex’s president, said, “The ability to measure complex geometry in a quick and accurate fashion, anywhere on the shop floor, makes this technology far superior to having a CMM. With FARO’s user-friendly technology we are able to validate results during the manufacturing process, make adjustments and know that dimensional part requirements are met on the machine tool or at the fitting table. Having this ability is a total game changer.”
About Brilex Industries
Brilex Industries has established itself as a worldwide source for fabricating, machining, and complete machine assembly. Founded in 1996 by two brothers, Brian and Alex Benyo, Brilex has become known as one of Youngstown, Ohio’s most aggressive and fastest growing companies. The company has grown to a position of leadership in its industry through proven performance, dedication, and continual investment in its people, facilities, and advanced equipment – providing both themselves and their customers with the advantages needed to compete in today’s global market.
With an aggressive and knowledgeable management staff focused on quality, efficiency, and on-time reliability, Brilex Industries has become a preferred full service supplier to many leading OE Ms and end users in the metals, rubber, plastics and glass, energy and power generation, and other capital equipment industries.
State-of-the-Art Measurements for Special Valves
The company’s Quality Manager, Giuseppe Ramponi, explained: “The particularity and geometric complexity of our products require highly specialized production processes and control procedures to ensure compliance with requirements and specifications.” To meet these requirements Petrolvalves has been using a FaroArm Platinum six-axis measurement arm with Measure X software (subsequently updated to CAM2 Measure 10) since 2005. “It is a sophisticated instrument that meets our needs perfectly,” Ramponi added.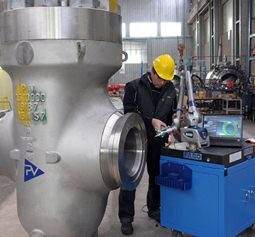
With the production of increasingly complex and technological components, and having seen the excellent results achieved using the “old” arm, at the end of 2011 Petrolvalves decided to evaluate the purchase of a second instrument. This device would be used to solve problems related to the measurement of actuators with highly complex geometry, recently produced for undersea valves. Following detailed research and several consultations with FARO, the company chose the FARO Edge ScanArm (i.e. a FARO Edge measurement arm with a Laser Line Probe), equipped with CAM2 Q and Geomagic Qualify software.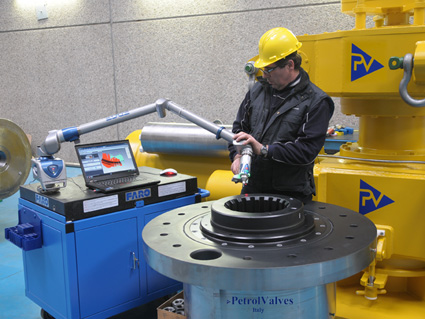
Ramponi: “Tests demonstrated that this was the right instrument for our specific situation since it takes fast, precise measurements of geometrically complex components such as undersea actuators, worm-screws, special shafts and grooves.”
In short, the FARO Arm offers a level of precision that is comparable to fixed-coordinate measurement machines. In addition to taking up less space in the workshop, it performs inspections more efficiently and eliminates machine downtime.
In particular, FARO’s new Laser Line Probe gives the FARO Edge new functionality and performance with regard to contactless measurement that would be difficult to match. In fact, the wide laser beam significantly increases scanning capacity without sacrificing precision while ensuring extremely high speed and definition. Without forgetting that it is possible to optimize measurement and scanning operations with the CAM2 Measure 10 software.
Giuseppe Ramponi concluded: “We have only been using the new arm for a short time – it went into operation in January 2012, following the training course – however, we are already using it with excellent results. We have even begun measuring geometrically complex pieces and we are obtaining excellent results in terms of precision, reliability and speed.”
Jackson Jonson Enterprise Builds Custom Services Using the FaroArm
the FaroArm as hit the ground running offering services not possible without the FaroArm,” says Bradley Smith, Jackson Jonson Enterprise’s General Manager.
Jackson Jonson Enterprise (www.jacksonjonson.com) is an independently-owned, design and fabrication company based in Austin, TX,offering product design, development and manufacturing services to a wide range of clientele including manufacturers, wholesalers, entrepreneurs and individuals. Specializing in reverse engineering, design, CAD and prototyping services, Jackson Jonson works with their clients to take any idea from the “cocktail napkin” stage to ready-for-market products.
As an integrated partner in the product development process, Jackson Jonson has expanded its capabilities over the course of the past year to include digital design, product description, precision measurement and rapid prototyping capabilities for the widest range of products possible. Using a custom tailored product development cycle consisting of four stages for each of its clients (Discovery, Feasibility, Definition,
and Execution), Jackson Jonson provides assistance in all aspects of the development process from drawing, modeling, materialspecification, project research, planning and
budgeting, to patent process guidance, marketability planning, and production.
Problem
Jackson Jonson recently acquired Air Force One Performance Industries, an automotive accessory manufacturing company with several lines of air intake products. As a growing company with a focus on providing clients with the best products and designs possible, the company knew they needed to equip themselves with the latest hardware and software. They wanted a CMM solution that would ensure that product quality was up to par with their new acquisitions, as well as provide them with a flexible, easy-to-use solution for reverse engineering and modeling of existing parts.
Solution
After comparing multiple products, the decision was made to purchase the FARO Edge ScanArm. As the latest generation of the FaroArm product line, the Edge improves production, quality, and reverse engineering processes by rapidly verifying or scanning parts with confidence and accuracy. The first ever “smart arm”, the Edge features an integrated personal measurement assistant that revolutionizes portable metrology by providing stand-alone basic measurement capability through its built-in touchscreen and on-board operating system. The addition of the FARO Laser Line Probe allows Jackson Jonson to significantly increase scan coverage without sacrificing accuracy, providing exceptional speed and feature definition. “From the purchase of the product through training, and even troubleshooting simple software tasks with customer service, implementing our FARO system has been very straightforward,” says Bradley Smith, General Manager of Jackson Jonson. Primarily used for drawing mounting points and
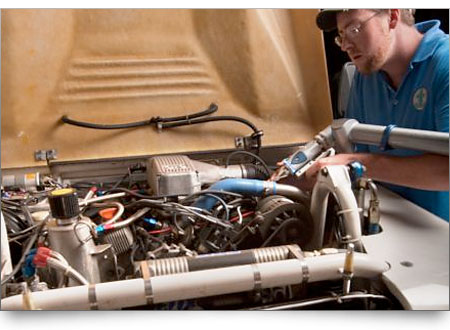
maximum tolerances in automotive applications, Jackson Jonson utilizes the FARO Edge along with CAM2 software to measure 3D spaces and objects quickly, easily and accurately. Jackson Jonson uses their Edge to measure the engine enclosures of vehicles for Air Force One Performance Industries intake products. This allows them to gather the critical dimensions in a digital format before they ever undertake a kit development. “By calculating the envelope in 3D space that we can fit our part into, the FaroArm allows us to build parts that fit the first time,” adds Mr. Smith. The portability, automatic reporting, and accuracy are key features that they rely on. Additionally, the Jackson Jonson team utilizes the Edge to measure bent stainless steel tubes that are used in the Air Force One Performance Industries’ automotive cold-air intake kits. The Edge has allowed them to quickly find the centerline bend radii on the tubes, as well as quickly model the assemblies with accurate hole placements, weld-on attachment placements, etc. As the most cost-effective solution among its competitors, the Edge provides Jackson Jonson with the versatility and flexibility they were looking for, in addition to a simple learning curve for new users. The portability of the device and the compatibility with various software platforms has helped Jackson Jonson to quickly gather precision measurements in any number of locations.
Return on Investment
Jackson Jonson has always looked for solutions to simple problems through creative applications of materials, design techniques, and fabrication methods. By integrating the FARO Edge into their toolkit, the team has found that nearly every project they take
on starts with some use of the FaroArm. Used in applications such as dimensional analysis, CAD-based inspection, prototype inspection and comparison, alignment in machining processes, and reverse engineering, the Edge has enabled Jackson Jonson to meet their customers’ 3D measurement requirements whenever and wherever they need them. “Jackson Jonson Enterprise was started with the FaroArm in mind; we have custom-built the service we offer to the public around the capabilities we
have gained. Because of how new we are, we haven’t so much replaced a process with the FaroArm as hit the ground running offering services not possible without the FaroArm,” says Mr. Smith.
Express Manufacturing Gains Full ROI with the FARO Gage
Express Manufacturing
did a trial program called the FARO Technology Test Drive (program valid for the American markets) which enabled them to evaluate the equipment in the “real world” situation of their own shop floor. With a minimal investment and no risk, they were able to test the Gage and prove out its ROI before purchase.
Express Manufacturing is a job shop that is dedicated to quickly producing accurate parts
for their customers. Based in Acton, Ontario,Express specializes in aluminum, mild steel, and even wood. With a goal of being an affordable machine shop, they focus on jobs with
smaller quantity outputs which best affords them the opportunity to do what they do best –
work quickly with accurate parts.
Problem
With a primary focus in the aerospace industry, specifically landing gear, Express Manufacturing
often must inspect bearing surfaces and mating surfaces with very tight tolerances. Solely using
micrometers and electronic height gauges on these parts created issues of time and material
waste and, generally, some frustration. Another issue that can also potentially hinder
achieving the desired high accuracy is the problem inherent with removing a part from a
tooling machine while in-process. Despite the best of efforts, it is difficult, if not impossible,
to set a part back into a machine for re-tooling exactly as it was before. In addition, simply
removing the part from a production machine for inspection and verification is, in itself, both
time consuming and expensive.
Solution
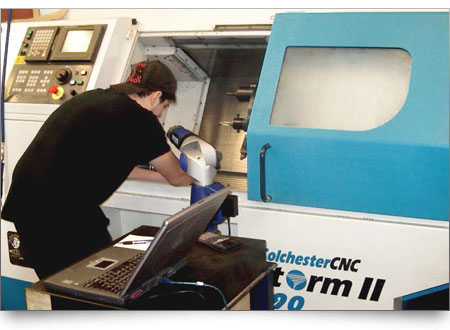
Inspecting parts directly on the machine >>producing them not only increases productivity, but also quality. On-machine inspection allows the machine tool operator to quickly and easily inspect parts directly on the floor while the part is being machined – resulting in tighter tolerances with fewer errors and re-work. Express Manufacturing was looking for a solution that would provide them the advantage of true onmachine inspection. That tool is the FARO GagePlus. The Gage is a highly accurate and easy-to-use measurement arm. It’s designed to be used directly on the shop floor and is ideal for on-machine inspection. Eric Wenger, the owner of Express Manufacturing, said, “On-machine inspection is where the FARO Gage shines and it really helps us a lot.”
They will still “double check” with the height gauge, but they can be confident in the part before
they take it off the machine. This saves them a lot of time, material, and that frustration.
Return on Investment
Express did a trial program called the FARO Technology Test Drive (program valid for the American markets) which enabled them to evaluate the equipment in the “real world” situation of their own shop floor. With a minimal investment and no risk, they were able to test the Gage and prove out its ROI before purchase. An added bonus for Express is now having a CMM
in their shop. They have since reverse engineered parts and have been able to verify the quality of parts they’ve been making for years. In fact, they verified their measurements using the FARO Gage with a very expensive table CMM and found no discrepancy at all.
“The implementation was very easy. Especially with the Test Drive program and training,”
said Wenger.
“We have better piece of mind now.”
The Gage has improved Express’ process measuring time and the accuracy of parts before taking them off the machine – again, saving a lot in material cost.
“The Gage turned a five week job into a three week one,”
said Wenger.
“We have saved about $15,000 so far in the year we’ve had the Gage and this figure would
be much higher if not for the rough economy. I project that FARO will save us about $25,000 to $30,000 a year in a normal economy.”
Wenger also said one unexpected benefit of having the FARO Gage is,
“It’s a great selling feature for when people come to see the shop. Customers like the fact
that it’s in the shop and we always make it visible when they come.”
About FARO
FARO develops and markets computer-aided coordinate measurement systems and measurement software worldwide. The portable measurement equipment from FARO permits high-precision 3D measurements and 3D comparisons of parts and complete systems within
production and quality assurance processes. They are used for inspecting components and component assemblies, production planning, and inventory documentation, as well as for the investigation and reconstruction of accident sites and crime scenes. They are also used for digital scanning of historical sites. Today, approximately 10 000 customers worldwide with more than 20 000 installations have put their trust in the company’s measurement systems (NASDAQ:FARO).
4 good reasons
Contact Measurement: Interchangeable ,probes mean the FARO Gage can be used to measure different geometries.
Ease of use: Universal hinges make it easy for the operator to move the Gage around all kinds of objects, minimising fatigue.
Volume of 1.2m: Small parts and moulds can be easily processed in the Gage’s 1.2m (4ft) measuring volume.
Portability: The Gage is a portable device for jobs needed on different areas of the shop floor.
Speed and flexibility gains in electrical motor production
The German industrial manufacturer Siemens is well equipped with a number of FARO arms to speed quality control and increase production flexibility in the Large Drives Business Unit.
The German-based industrial multinational Siemens needs no introduction as a global leader in drives, automation, transport, building technology, lighting and industrial solutions. Within the Drive Technologies Division, the Large Drives Business Unit makes motors and the associated transformers and control components that are found in railway locomotives. Further products include drive systems for machines used in the textile, packaging and printing industries.
The manufacturing quality control department of Siemens Large Drives Business Unit uses five FARO arms.
About 210 employees are involved in the unit’s mechanical manufacturing department on Vogelweiherstraße in Nuremberg. Supporting them is a team of 8 metrologists in the quality control / measuring department. In 2005, they acquired their first FaroArm Platinum, to replace a conventional 3D coordinate measuring system and a range of manual methods. Excited by the substantial timesavings, Siemens added another four FARO arms when the Quantum became available.
“We heard about FARO products at an exhibition and then attended an Open House event organized by FARO Europe. Having seen the equipment demonstrated we were no longer surprised by the astonishing time savings that we were able to achieve with FARO arms,” explained Karlheinz Leitner, Head of CNC Programming in the Mechanical Production department. “We estimate that we are now making time savings of 50 – 60% over our previous methods of measurement. Furthermore, using the FARO arms has many wider benefits.”
Parts are made in batches, and every time a new batch is started, the first part needs to be taken to the quality control department and approved before the rest of the batch can be completed. With a FaroArm, the time required for measuring is substantially reduced; so smaller batches have become more economical. This increases production flexibility. Parts can even be measured while still mounted in the manufacturing machine thanks to the portability of the FARO arms.
Normally parts to be measured range between 0.2 and 1.2m in size, but sometimes parts exceed the standard 2.4m volume of the FaroArm Quantum. However Leitner is unperturbed: “Using the leapfrog method with magnetic reference points, the range can be easily extended.”
The Siemens Large Drive Business Unit works with Delcam PowerINSPECT software, which integrates seamlessly with the FaroArm. When a new part is introduced, the quality team creates a measurement program based on the available 3D plans. This defines the required measurements and tolerances. Thereafter, the operator can simply take the measurements and automatically generate a report. “All in all, we are very pleased with the productivity increases that we could achieve thanks to the ease of use of the FARO arms.”
About Siemens AG:
Siemens AG is a global powerhouse in electronics and electrical engineering, operating in the industry, energy and healthcare sectors. For over 160 years, Siemens has stood for technological excellence, innovation, quality, reliability and internationality. In fiscal 2010, revenue totaled some €76 billion and net income €4.1 billion. At the end of September 2010, Siemens had around 405,000 employees worldwide.
