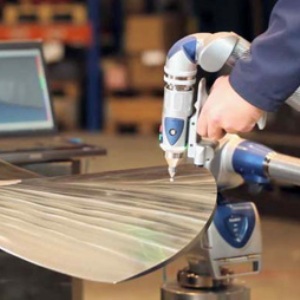
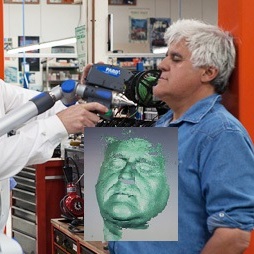
Portable CMMs from FARO simplify the implementation of geometric dimensioning and tolerancing (GD&T) and provide efficient, easy-to-use solutions for CAD-based 3D inspections and nominal comparisons.
With their versatile contact and non-contact measuring capabilities, tools such as the FaroArm, FARO ScanArm and FARO Laser Tracker can utilize CAD overlays to check complex geometry against design or CAD comparison to evaluate deviations in surface form and ensure every part is machined to an exacting tolerance.
The contours, charisma and creation of supercars
Automotive Inspired by Italian renaissance heroes, legendary car designer Horacio Pagani creates the world’s most exclusive supercars by a masterful fusion of manual craftsmanship and technology.
The Argentinian-born designer Horacio Pagani, has risen to the top of supercar industry making a name for himself through his application of advanced composite materials. At Lamborghini, he worked on the designs of various famous models before founding Modena Design and starting work on his lifelong dream – the Pagani Zonda. Between 1999 and 2011, 206 variations of the Zonda were created and built. In 2011, Pagani revealed his new Huayra. It is a stunning curvaceous creation that is to many eyes, the fulfillment of Pagani’s dream to create the most beautiful car in the world. While championing a commitment to renaissance artists and hand craftsmanship, Pagani is firmly settled in the 21st century when it comes to metrology: the company owns two FaroArm Fusion systems. It also has one FARO Laser Line Probe that can be attached to either measuring arm to provide seamless Laser ScanArm functionality. With these systems, Pagani is perfectly equipped for free form surface measurement, part inspection, part-to-CAD comparison, rapid prototyping and reverse engineering.

Horacio Pagani, you started as a one-man design studio making furniture over 20 years ago. What elements of your approach have stayed constant?
Firstly, when I was about 16, I started learning about Leonardo and the Renaissance. I was fascinated by the way he mixed art and science and I wanted to do the same: to be both an artist and an engineer. That has been the consistent theme throughout my professional life. Secondly, I have always admired plastics because they allow you to be more expressive as a designer. I realised the significance of advanced composites in the eighties and we have been investing in applications of that technology ever since.
Tell us about the mixture of inspiration and technology behind your design process.
The female body was clearly a source of inspiration for the shapes of the Zonda. We work manually in the early stages with pencils and resin models. There is a charm that only the hand can give. When we have the cosmetics perfected, we use FARO 3D portable measuring systems and move into the CAD realm to deal with structural calculations and progress towards CAM.
There are 3 FARO devices in operation in your workshops. What other roles do they play?
We design and build our cars from scratch and we now manage about 10,000 distinct components. We use FARO arms and the Laser Line Probe for all kinds of tasks from reverse engineering during design to inspection and alignmentduring construction. They are an integral part of everything we do.
What new ambitions fuel your vision today?
I still work on many different projects covering automotive, aviation, military, sports and industrial design. Discovering new materials and new technologies still fascinates me.
Vodafone McLaren Mercedes: Pushing the technology boundaries
FARO is the world’s most trusted source for 3D measurement technology. The company develops and markets computer-aided measurement and imaging devices and software.
The McLaren Group is a rapidly expanding high-technology business based in Woking, Surrey, and the home of the Vodafone McLaren Mercedes Formula 1 racing team.
In such a fast-moving business – around 90 per cent of the components within an F1 car will be redesigned over the course of a racing season – speed, precision and quality are vital.
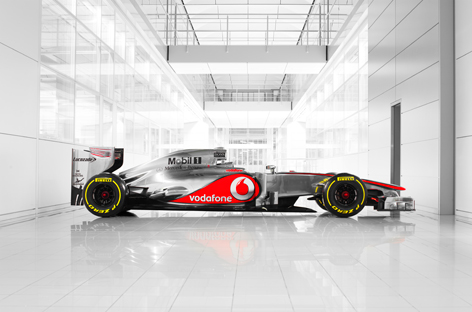
Vodafone McLaren Mercedes had already been a FARO customer for nearly 10 years before the partnership began in May 2010. FARO is now the McLaren Group’s Official Supplier of measuring systems, which includes the FARO Edge Arm, the FARO Gage and the FARO Laser Line Probe for non-contact measurement, and software such as CAM2 Measure 10, now including point cloud capability.
How the relationship began
While research and development is an important activity, the assembly and production process must be able to translate the results of that development into products which meet stringent quality requirements. The challenge is to take complex forms created on Computer-Aided Design systems and manufacture those components in a way that is not only dimensionally accurate, but which also meets rigorous weight and strength criteria.
Andrew Tagg, Regional Manager UK at FARO Technologies, says: “The first FaroArm went into the composite inspection area, and then subsequently we supplied a Laser Line Probe, which is an attachment on the end of the Arm that’s used for non-contact measurement. It enables the user to scan the surface of a pattern, taking millions of points.
“Using that cloud of data, it shows the operator a colour map deviation that enables you easily to compare the item with the CAD model; in simplistic terms where the cloud goes green, that area is within tolerance. If the colour map turns red that signifies an excess of material, and blue shows that it’s too low.
“As you can imagine, this not only expedited the inspection process, it added a new order of accuracy.
“The next stage of the collaboration was to bring a FARO Gage into the machine shop. This also provides a fast dimensional comparison with the original drawing; it’s a contact mechanism using a ball probe, so it enables you to check the geometric dimensions in 3D. By enabling you to quickly check a machine tool or within a cell of machines, this eliminates all the bottlenecks you get with traditional methods.
“Our aim is to speed the process up, get results quicker. A process that would have taken hours now takes minutes. Rather than reams and reams of paper with values on, you have a graphical display that’s easy to interpret.”
The benefits of partnership
FARO’s equipment enables the McLaren Group to maintain its quality focus, reduce wastage, expedite the prototyping process, and much more. For FARO there is a tangible benefit in terms of feedback from a customer that is operating at the very limits of technology.
McLaren Racing Managing Director Jonathan Neale says: “In a high-precision, time-critical environment such as ours, it’s vital that we can rely on highly accurate measuring and inspection systems in order to guarantee 100 per cent precision within very rapid production and assembly processes.
“Here at Vodafone McLaren Mercedes, we’re justifiably proud of the speed and efficiency of our existing manufacturing and assembly procedures, but FARO’s contribution will not only allow us to increase the speed of those processes, but also improve fidelity and accuracy.”
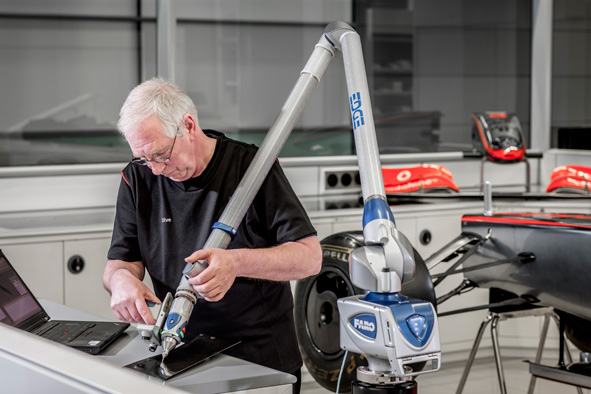
McLaren Racing Head of Quality Alex Smith says: “We use FARO equipment for a number of purposes. Fundamentally, at the front line, we use it for quality control – to ensure that parts meet their design specification and intent. We’ll use the equipment on both: carbon fibre and metallic components, as well as the patterns and mould that are used to create carbon fibre components. Pretty much every part that comes through the business, in fact.
“It’s critical in protecting the car in terms of the quality perspective. If we find defects in components we can feed that back to the manufacturing department and re-evaluate how those components are designed and manufactured, which improves the overall yield.
“We also use the FaroArm in the wind tunnel, and in the model shop to check the models before they go into the tunnel, to ensure that they meet all specifications.
“From an analysis perspective we do a lot of work with the data we generate through the FARO interface to tell us about the components. We analyse the data and trend it to indicate how capable our manufacturing processes are, and that gives us a lovely feedback loop right the way back to the design process. We can have discussions with the designers about tolerances and getting everything right first time so that we have a good yield of parts.
“We’ve worked very closely with FARO for a number of years and done a lot of product development work with them. Our feedback has been incorporated into a number of new software releases. It’s a very good working relationship.”
Andrew Tagg says: “Our systems help to eliminate a lot of wastage and they enable McLaren Racing to press ahead with new designs. They have such a rapid turnaround because they’re always developing something new, whether it’s a prototype component to evaluate in the wind tunnel or a finished item to go on the race car. If you have to wait to put that component on a traditional measuring machine, you’re adding delay to the process.
“Since we’ve become partners we’ve gone into many areas of McLaren Racing, including the wind tunnel preparation area. The FaroArm can be used to set the datum on what the aerodynamicists call the ‘spine’ on the wind tunnel car, and they provide a live digital readout for precise positioning of the components on the spine. That’s a benefit in terms of speed and accuracy, as well as flexibility, because those parts can be readjusted to very precisely defined co-ordinates.
“We’ve also gone into vehicle dynamics, the testing rig, and our products are also being used by McLaren Automotive.
“They’ve helped us develop our software, providing fantastic feedback that has driven through a lot of performance improvements, such as shortcuts for commonly used subroutines.”
The future
Alex Smith says: “We need to maintain alignment with the latest developments because as a technology company we’re always pushing the boundaries. As our geometries become more complex and more difficult to measure using traditional methods, we look to FARO for the development of new solutions.
“I always look to get the latest FARO products into the building and I know they’re equally keen to test their new developments in such a demanding environment.”
About the customer: VODAFONE McLAREN MERCEDES
Since 1963, McLaren Racing has become one of the most successful and groundbreaking teams in Grand Prix motor racing, creating some of the most iconic Formula 1 cars in the sport’s history.
Vodafone McLaren Mercedes had already been a FARO customer for nearly 10 years before the partnership began in May 2010. FARO is now the McLaren Group’s Official Supplier of measuring systems, which includes the FARO Edge Arm, the FARO Gage and the FARO Laser Line Probe for non-contact measurement, and software such as CAM2 Measure 10, now including point cloud capability.
Brilex Improves Quality Program with FARO’s “Game Changing Technology”
Metal Fabrication / Inspection – Alignment & Verification
 Brilex Industries has established itself as a worldwide source for fabricating, machining, and complete machine assembly. Founded in 1996 by two brothers, Brian and Alex Benyo, Brilex has become known as one of Youngstown, Ohio’s most aggressive and fastest growing companies. The company has grown to a position of leadership in its industry through proven performance, dedication, and continual investment in its people, facilities, and advanced equipment – providing both themselves and their customers with the advantages needed to compete in today’s global market.
With an aggressive and knowledgeable management staff focused on quality, efficiency, and on-time reliability, Brilex Industries (www.brilex.com) has become a preferred full service supplier to many leading OEMs and end users in the metals, rubber, plastics and glass, energy and power generation, and other capital equipment industries.
Problem
As expected for a manufacturer that supplies such a large range of industries and customers, the parts that Brilex works with everyday have an equally large range of size. Parts can range anywhere from as “small” as 30 pounds up to 70 tons. These parts tend to be medium to large fabricated and machined and/or assembled products such as various housings, gearboxes, platens, bearing races, scissor lifts, shredders, transfer cars, pressure vessels, chocks, bushings, work roll shafts, turbine components, and more.
Traditionally, Brilex used an assortment of tools in order to measure these various parts as it would be difficult for one tool to be the answer for all of their needs. They used OD (outside diameter) and ID (inside diameter) micrometers, height gauges, bore gauges, calipers, and other similar hand tools.
For Brilex, like many manufacturers, time and capability are always an issue. Over the past few years, the products the company builds and works with have become increasingly large and complex. In addition, many customers now require extensive documentation packages with complete traceability of material and dimensional resugalts.
The measurements obtained from traditional tools were sufficient, but were time consuming considering the increasing complexity of the parts and required multiple setups to measure all of the critical dimensions – if not impossible.
Solution
Brilex needed a better solution, a solution that could answer both their expanding need for quality and their ever-present need for time. Their answer came from FARO. The portable CMMs provided by FARO enable Brilex to perform many of the inspections they require with much greater accuracy and repeatability in a fraction of the time. Where it was not always possible to get all of the measurements they needed using past methods, they can now be achieved using FARO.
Brilex chose FARO not only for the time savings and the improved accuracy their devices provide, but for FARO’s industry reputation. The FARO equipment has even generated a great deal of excitement in Brilex’s customers when they visit and see them in action.
There was a learning curve in implementation of the new technology, especially in changing the mindset of those accustomed to using conventional measurement tools, but the combined training and support provided by FARO made this fairly seamless. That support was provided by local Account Managers Trevor Murcko and Eric Boyer as well as Applications Engineers and online support. Their assistance helped to show the benefits of reducing inspection time and proving the results that enabled Brilex to change their processes and improve their overall quality.
Brilex uses both the FaroArm and the FARO Laser Tracker ION on a daily basis to verify setup, in fabrication inspection, and during final inspection. A portable measurement arm, the FaroArm is used mostly on parts where GD&T is called out or in situations that may require additional setups. The FaroArm can be placed directly on the part or set on an inspection table and measuring can be started without having to setup or level the part being inspected. The scanning feature is used, for example, to check the profile of a casting and then compare it to the CAD file to assist manufacturing. The flexibility and portability provided by FARO are key and many of the software features in CAM2 are huge time savers for Brilex.
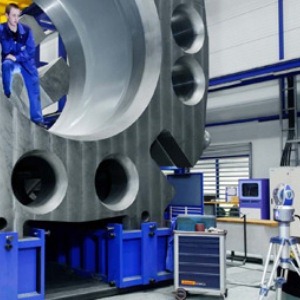
The parts checked by Brilex with the FARO Laser Tracker are generally those that are in excess of 20-ft long. Such parts typically require specific flatness tolerances. In other cases, such parts will have faces to be machined and the Tracker is used to verify that proper stock allowances exist. In some cases, subject parts have specific angles that are required to be held or machined. Another advantage of the Tracker is that it is very accurate in verifying specific locations over a long distance that must be held. Regardless of the length of the part, the Laser Tracker can be used to verify all features either in a single setup, or in multiple setups. If multiple setups are required, reference points can be established during the first setup, then the Tracker is then moved to a new location and the reference points are picked up from the first setup and used for another set of measurements.
The FARO ION allows Brilex to check dimensions over greater distance and to inspect geometric fit, form, and function items that would otherwise be extremely difficult and cumbersome to evaluate.
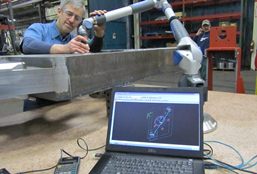
Bud Geddes, Manager of Manufacturing at Brilex, said, “The most significant advantage of a laser tracker versus a conventional laser measurement system is the ability to establish datum points on the work piece being evaluated and leapfrog the tracker around the work piece. Doing this allows the user to measure relationships between features that would otherwise not be possible.”
“Some of the products we manufacture are fairly large and expensive,” said Dan Hall, the Quality Control Manager at Brilex. “When mistakes cannot afford to be made, we have used FARO, specifically the Laser Tracker ION, to ensure machine tool and part alignment prior to machining critical features.”
Return on Investment
For Brilex, their FARO solutions have improved their capability and confidence as well as the quality they deliver to their customers. FARO provides Brilex consistency in their results from inspection and this, in turn, allows the company to continually improve their quality program.
Alex Benyo, VP of Brilex, added, “The addition of FARO equipment is just another example of how Brilex continually makes investments in technology and resources to be best in class.”
As an example of real return, a part that had previously taken an average of 5 hours to inspect, can now be inspected in less than 2 hours using FARO due to the time saved not having to retrieve and calibrate or to do additional setups with all of the other measuring equipment they used previously. Most of the products Brilex manufactures are not repeat production, but when they do work with more than one part, the time saved using FARO is also reduced.
“Having FARO instills a sense of confidence in our customer,” said Mr. Hall. “Having the ability to assure dimensional conformance of large products with stringent quality requirement has definitely played a role in the placement of several new orders. But, the greatest benefits we have realized are the time savings and the improvement in our ability to measure large fabrications – and the added confidence of our customers.”
Brian Benyo, Brilex’s president, said, “The ability to measure complex geometry in a quick and accurate fashion, anywhere on the shop floor, makes this technology far superior to having a CMM. With FARO’s user-friendly technology we are able to validate results during the manufacturing process, make adjustments and know that dimensional part requirements are met on the machine tool or at the fitting table. Having this ability is a total game changer.”
About Brilex Industries
Brilex Industries has established itself as a worldwide source for fabricating, machining, and complete machine assembly. Founded in 1996 by two brothers, Brian and Alex Benyo, Brilex has become known as one of Youngstown, Ohio’s most aggressive and fastest growing companies. The company has grown to a position of leadership in its industry through proven performance, dedication, and continual investment in its people, facilities, and advanced equipment – providing both themselves and their customers with the advantages needed to compete in today’s global market.
With an aggressive and knowledgeable management staff focused on quality, efficiency, and on-time reliability, Brilex Industries has become a preferred full service supplier to many leading OE Ms and end users in the metals, rubber, plastics and glass, energy and power generation,
and other capital equipment industries.
Vodafone McLaren Mercedes: “Speed of what we do is what it’s all about”
By Brendan Coyne, QMT, April 2011
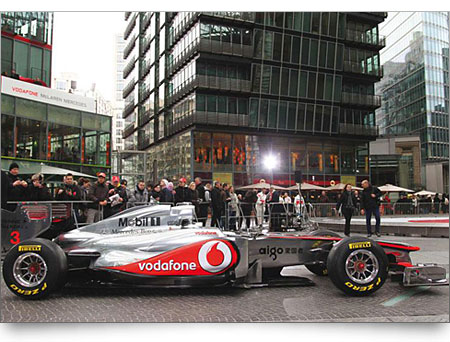
“Speed of what we do is what it’s all about,” says Simon Roberts, operations director for McLarenRacing. Simon is responsible for all the operations, from design of the F1 race cars, manufacturing, supply chain logistics, quality and service of the parts, getting everything out to the track. “To put it into context, if we take all the design changes, all the updates we do, and averaged it throughout for the year, it’s a design change every twenty minutes on a 24/7 basis. Basically, the car is never the same one week to the next. There’s always something new, something different. It may just be something small or it could be something major such as a complete change of bodywork – such as new front wings or new rear wings. This is where measurement technology provides accuracy and good data for the engineers to make decisions.
One of the very important things, particularly with the FaroArm and software, is that we can do things really quickly. There is no point in us having elaborate inspection processes that take 3 or 4 days of time. We are not going to wait for that. We would end up skimping and just measuring a few key points. With the non contact scanning devices on the Faro portable arms, we can actually see the surface. Without a laser scanner, its much more difficult to see the surface and interpret that data. One of the things we’ve been talking about at Vodafone McLaren Mercedes is moving the point of inspection to the job rather than inspecting in a separate department. There will always be a place for a CMM for small parts, racking them out – it’s more productive. But when you are measuring a chassis or patterns or moulds, if you can measure it in its fixture – then you can probably do something about it immediately.You’re not re-jigging it. You can get the engineer there. That’s how I see inspection evolving.
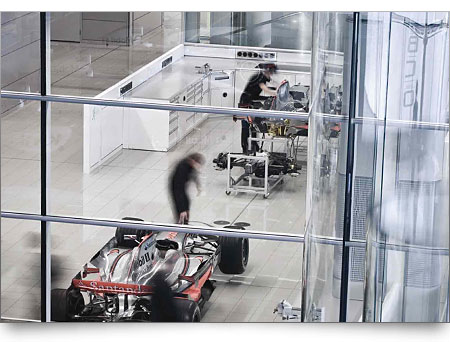
Workshop inspection
As mentioned, we’re at 24/7. All the composites, all the manufacturing, are four shift systems, day and night and over the week end. We just haven’t stopped. So it’s all its about time compression. Every hour a job’s delayed is an hour out of lead time.
About 2 years ago, composites (inspection) used to be in a room on its own, as is mechanical parts inspection currently. We’ve deliberately moved composite inspection out of its room and put it in the shop where the parts and the rest of the department are because we got fed up of having those conversations in production meetings: “Where are the parts? “ “Oh, they’re in inspection.” If you put inspection in the workshop, then the parts aren’t in inspection – they’re in the workshop. You then expect the production manager to know because it’s just another production process – whether he’s trimming a part or inspecting a part, its all under his remit. This works really well.
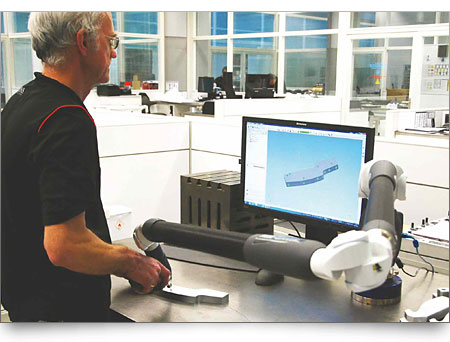
Having the Faro arms removes the barrier between production and inspection. That’s a huge step. Take a wall down and it makes a huge difference to hearts and minds. Some of our production machines are vast – 4 metre cube volume. With a portable measuring arm, operatives can walk into them and check a chassis whilst it’s on the machine without moving the chassis. You can verify it before you remove it, just in case there is a rework issue. This provides an independent check from the machine system. If there is something wrong with the production machining, which utilises a measuring head to check the part, you are simply going to repeat the error. Whereas, with the portable arm as an independent measuring system, you turn up, find the datum and measure to find the error. Because you can go round the part with the arm and keep re-datuming, it’s perfect for our complex shapes. This inspection advantage applies to both finished part and interoperational
checking.
Data driven inspection
We manufacture the chassis, transmission, everything except the engine which is supplied by our partner, Mercedes-Benz HighPerformanceEngines. For parts such as chassis and wings, it is essential that we know, and are confident about the shape and form. Without data, you cannot do this. Mclaren are a very data driven organisation. When the car is running on the track, we record magabytes worth of data. And that logic is also true when we are making a part. We don’t want to take off-the-cuff decisions about what type of tool to use. We want to know what the right tool is for a wing assembly, or the right tool technology for a chassis, and we only know that if we understand the limitations of what we do.
The right tool is defined at the design for manufacture stage. So this data, this knowledge has to feed back into design for manufacture.” Quality control manager Keith Holland explains, “Traditionally, metrology has been a big safety net set under a manufacturing area, catching all the bad apples as they go through. What we try to do here is to build quality into the start of the process.” Simon Roberts continues, “Bear in mind, we make very low quantities. So for us, sixoff could be the full quantity of a component. For example, we make only four chassis or six wishbones and then the design will change. So you haven’t got time to do traditional statistical process analysis.
We do stats analysis, but you have to do it with small sample sizes and you have to understand the limitations of that. Our approach tends to be more generic. What we are trying to do is to understand the yield of a process in its totality. We want to know what the yield of wishbone manufacturing is. When we identify specific issues, then we’ll change things – process, tooling or techniques – to eliminate them. If you are only going to make six components and you make 3 scrap ones, then you’re having a pretty bad day. If you make 20,000, three scrap are in the noise. There is variability – we make mistakes, machines don’t exactly follow CAD, material is not always what you thought it was, things go wrong.“
Keith Holland comments, “A lot of parts have a life cycle, so we need to build a certain amount in the knowledge that we have a certain amount of kilometres to fill through the year.” Simon Roberts continues, “Like aircraft, all the structural parts are serial numbered and they are all “lifed”. They all go through various proof testing and NDT operations as part of their manufacturing process. Part of their servicing is to bring them back into the factory and have them re-inspected from an NDT point of view and reproofed.
Proactive measurement
The drive for data has evolved over quite a long period of time. Certainly, in the last 8 years, inspection has moved from being a safety net to being a proactive force with the organisation. The resource restriction, which came into effect last year, has also caused us to look long and hard at how we spend our money. In the past, we have sometimes been able to buy our way out of trouble: if the process wasn’t very robust or if scrap parts had been made, you just bought more. We can’t afford to do that now. We are regulated to how many people we employ and how much cash we spend. So spending money on bad parts we’ve spent the last two years raising our game in terms of our own understanding, and the engineers understanding, of what yield is all about and what the benefits are of having robust processes that give you exactly what you want when you want. It’s about making parts right first time – zero defect manufacturing is the goal.
To process FMEAs, which is a great help. It gets you thinking in a different direction. We have a very good mechanism for recording faults. For faults seen on the race car – for example, if something doesn’t work the way you expected or fails before you expected – we have a very sophisticated mechanism for reviewing that. It’s a real-time close loop system which leads right back to design through manufacturing. We also have an internal non conformance system for parts we make and for parts we buy in, which is very proactive. It looks to eliminate waste in its broadest sense – in time, material or cash. Together, all this forms part of what you would call our quality system.
Hit it hard
Typically, every year, we have some two or three really difficult quality problems that are not just as simple as redesigning a part, or changing the source, or changing the manufacturing process. You might not even understand why a part doesn’t perform the way you expect. Over the years, our experience has taught us that if you look back in hindsight, you can often see early signs of those things. As a result, we call them Achilles Heels. They are things that you thought were OK but, in hindsight, weren’t. They normally end up being very long running and expensive. So our approach now, when we think we’ve got something like that – when we get that uneasy feeling when we see all the data – is hit it hard, hit it with really good people who have got all the skills, tools and techniques and don’t let it go till it’s fixed. A good example of that was when we lost the World Championship in Brazil 2007, where we lost gears for 30 seconds on Lewis Hamilton’s car in the last race of the year. Eventually we found it through design of experiment and sticking with it, looking at data and trawling through everything you know and everything you think you know.
Six sigma?
Six sigma was born out of the electronics industry, with companies such as Motorola. Today, these companies operate at 8 and 9 sigma levels. McLaren aren’t a six sigma company and there’s a reason for that. We do have six sigma black belts and green belts. You could very easily convince yourself that, if we were six sigma, all this stuff would go away. But there is a problem with that and it’s to do with complexity. When you multiply sixsigma quality by our levels of complexity, you very quickly get to a condition where there will be a determinate number of failures. We have studied that in depth. When we looked at our processes for the assemblies we make, we actually run around four sigma, but individual parts are generally in excess of six sigma. It’s that fact that you multiply up – if you build a F1 gearbox with six sigma parts, you don’t then get a six sigma gearbox assembly. So we can’t sit here and say our race car is a six sigma product. For us, a defect is anything that means a car doesn’t perform to the ultimate. Reliability is half the battle, you’ve also got to create a fast car and have the skills (strategy and drivers) to race well.”
About Vodafone McLaren Mercedes
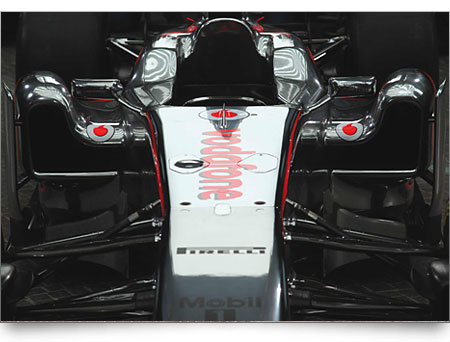
Since its foundation in 1966, the McLaren Formula 1 team has become one of the most successful and groundbreaking teams in grand prix motor racing. McLaren Racing is the nerve-centre of the racing operation, housing the extensive design office, 60-per-cent-scale windtunnel, manufacturing plant, fabrication facilities and build stations that dovetail together to create some of the most iconic Formula 1 cars in the sport’s history.
The McLaren Formula 1 team has won four consecutive Drivers’ and Constructors’ Championships (1988-1991) and secured eight Constructors’ World Championship titles, the first of which was in 1974. Today, the team has a record 12 Drivers’ World Championship titles.
This article is reprinted from Quality Manufacturing Today magazine, April 2011 issue, published by Cranbrook Media Ltd.,.www.qmtmag.com, copyright.
